
The older type of CD Changers fitted to vehicles that are ten to fifteen years young, if still in situ, are running on borrowed time. Complex electromechanical systems and solid state LASERs don’t have an infinite life and often replacing the unit with a more modern radio/cd or MP3 player is the best choice. However for those of us with older integrated COMAND systems that use a dedicated cut out in the dash, it is not always practical to change the head unit to a more modern type without huge expense and if we want to play CDs the remote changer has to work as the slot up front is for the NAV disc only.
So what do we do then… The option is to source a used unit from a scrap car or breaker but it is most probably from the same era and will most likely be well on its way to end of life. So if you have an issue of ‘Magazine Empty’ or a badly skipping CD changer then there is a couple of last things to try before lifting the lid on the recycling bin and dropping it in!
As the LASER ages it becomes less powerful, rather like a halogen bulb that yellows and gives off a degraded level of illumination to that it did when new. What we can do is increase the current to the laser slightly to lift its light output to compensate for its ageing and hopefully put the player back into service for a while longer. (please note that by increasing the LASER current over the specified factory set optimum, will have the effect of shortening its life, but my view is – if the player does not work correctly now because of a poorly performing aged LASER reader, then it clearly can only really be fixed by replacing it – a cost option that usually outweighs the purchase of a complete replacement player.)
Obviously it goes without saying that it may just be dirt that is hampering the function of the CD player and in a few cases cleaning of the LASER lens will rectify the problem. This is the thing to try first before making any electrical adjustment. You can use one of the specialist cleaning CDs you can buy with a fine brush attached to the playing surface. As this is drawn into the disc changer and played, the fine brushes gently sweep dirt and dust particles from the lens at very high speed. More stubborn dirt will have to be removed with the delicate use of a cotton bud and surgical alcohol.
Assuming that you wish to proceed with trying to breathe a new lease of life into your old disc changer, and that you are not too bothered by the chance of failure – then read on.
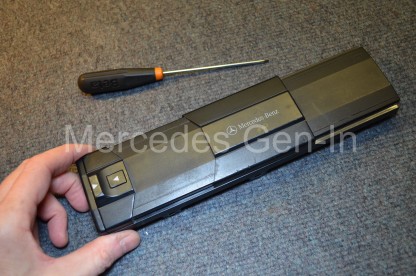
Eject the CD cartridge from the mechanism, disconnect the cables and orange DB2 fibre connection removing the player from its bracket in the car. Working on a table or bench, unscrew the four cross-head screws from the sides and three from the back of the unit case, two of these hold the fibre convertor. This then slots off sideways and the orange ribbon can be disconnected from the PCB connector by simply sliding out the white plastic anchor section about 2mm, releasing the foil from the PCB. Now completely lift off the cover.
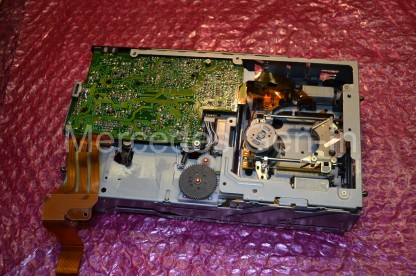
Unhook the spring loading mechanism from each side of the unit, noting the position of the levers before doing so. These are set depending on your player installation – either Horizontal or Vertical. Now pull off the four ‘gel’ shock dampers from the retaining spikes on the inner chassis (2 on each side) and undo a single retaining philips screw on the connecting orange foil assembly. The inner chassis should now pull free from the base section.
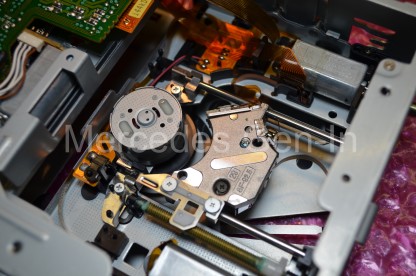
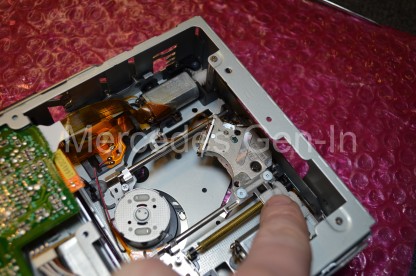
Identify the laser saddle and turn the lead-screw cogs with your finger to drive the LASER to the outer edge of the chassis, once in position turn over the player and you should be able to see the floating lens assembly through a gap in the mechanism top plate, there is enough room here to slide in a cotton bud and lightly brush the lens clean. Use alcohol if any deposits are stubborn or difficult to remove, dry thoroughly and polish off any residue lightly with a dry cotton bud. You may wish to try the player to gauge any improvement at this point, before moving on to the ‘last stand’ of adjusting the LASER current to get that last bit of life out of the player.
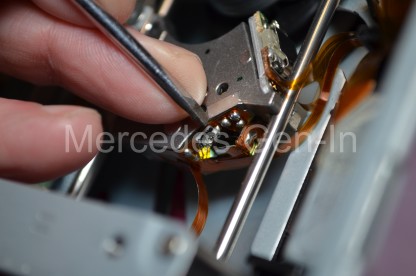
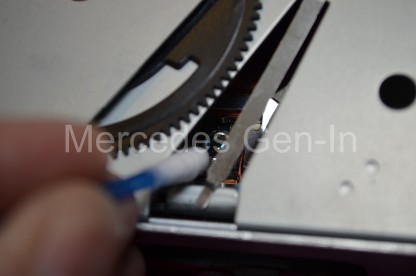
Go back to the lead-screw and run the LASER to its most inward position in the chassis and then look on the revealed vertical edge of the saddle and you should see a small ceramic trimmer or potentiometer, about 3 mm in diameter. This adjusts the LASER current. On Older wired and DB2 Mercedes and BMW, Alpine and Becker changers – current is increased by rotating this tiny trimmer anti-clockwise. It only needs to be moved by a small amount, as a small increment is often all that is needed to restore the player to a working state that may last for a good period of time, maybe year or even more depending on your luck! Remember the LASER is probably problematic anyway due to its age, so by increasing the current you are stressing it beyond its designed limits – but if you win a year or more use out of it before the inevitable replacement of the changer – whats to lose! Rotate the trimmer about 30 degrees anticlockwise and rebuild the unit and test. More often than not this is all that is needed to get things running again.

If you need to apply power to the CD changer while on the bench, dismantle the fibre converter housing and attach 12v DC supply as shown across the power diode on the PCB
Good luck! Remember this is not a repair, it is hopefully a ‘get-out-of-jail card’ used to squeeze the possibility of a little more operating time from a unit that is eventually going to fail. Usual disclaimers apply, you do this modification totally at your own risk under the full understanding that it may not work for you and that it could backfire and you end up junking your classic player.