For a couple of weeks the distinctive smell of antifreeze along with fogging of the interior window surfaces when the heater was used – spell the tell tale signs of the heater matrix leaking. Replacing this is not a not a job for the faint hearted, not because it it overwhelmingly complex, but for the fact there is so much to take off and replace – all in the correct order. If you have the confidence to tackle this job it will be one of the most rewarding mechanical adventures you will undertake, next only to rebuilding an engine.
There is a great deal of differing screws and intricate wire routing that all has to be replaced in their correct positions but apart from that, if you are methodical and take lots of pictures as you take it apart – you really cannot go far wrong.
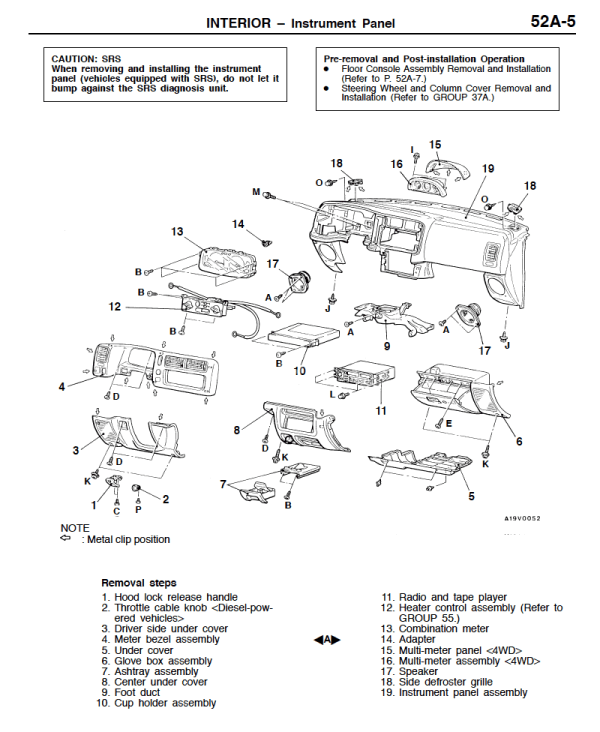
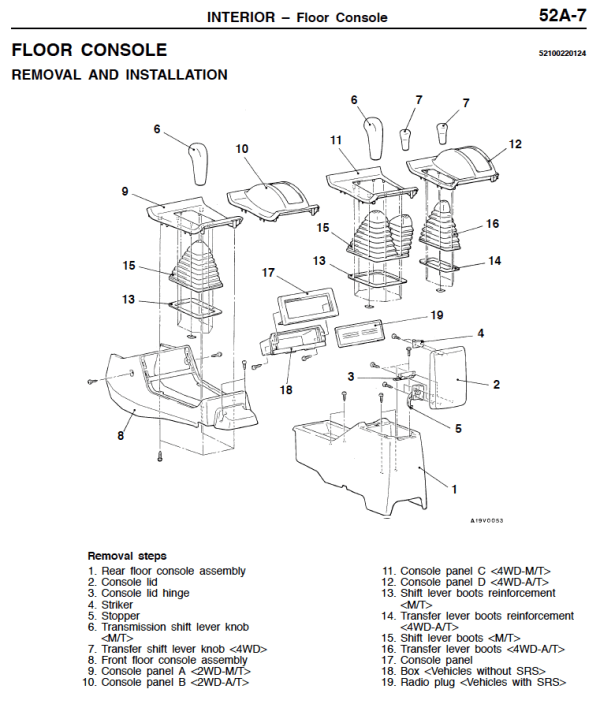
I followed the instructions detailed in this extract from the service manual with great success. It would be impossible for me to do a step by step write-up of all the stages of the work carried out and in many ways you need to think it through as you go. The best information given is where the location of screws, bolts and clips are to assist in the strip down. It is also good to have a chart of what type of screw fits where, if things get a little jumbled on the rebuild. All this valuable information is below.


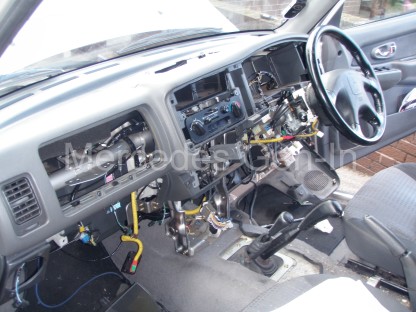
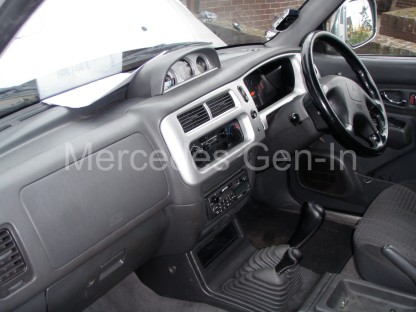
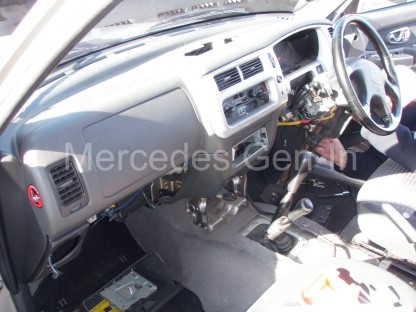
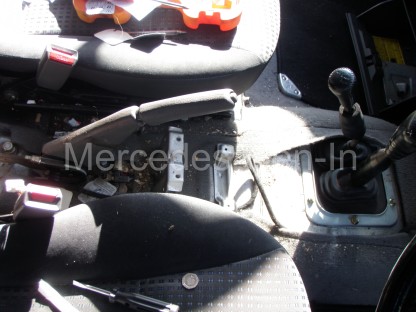
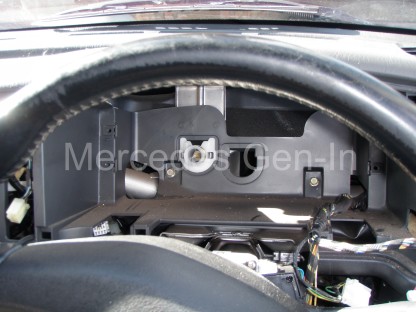
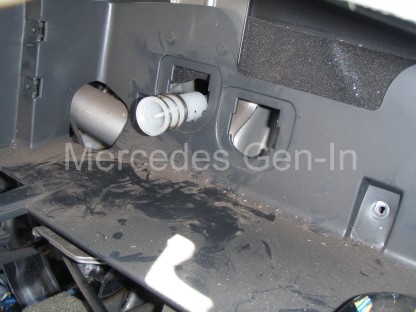
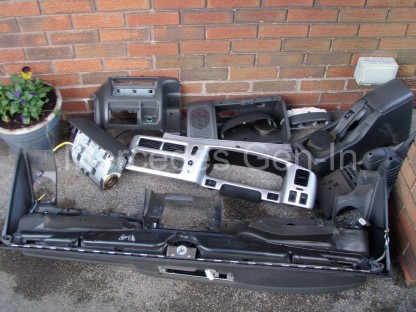
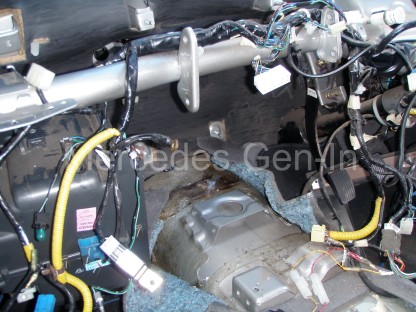
Here are a selection of photographs from the work carried out that will hopefully give you some guidance as to what is required and the overall layout/what to expect when you get it all apart. For a rough guide, including the under bonnet work to release the feed and return hoses to the matrix and topping up the coolant system, expect in the order of 6 hours work to complete the task. It will be an advantage to have a helper on hand at a few critical points, one being to get the dash out of the passenger side of the vehicle without the removal of the steering wheel. (Use the void where the instrument cluster lives to allow you to turn and rotate the dash, extracting it through the passenger door.)
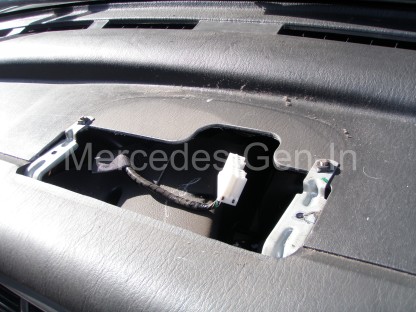
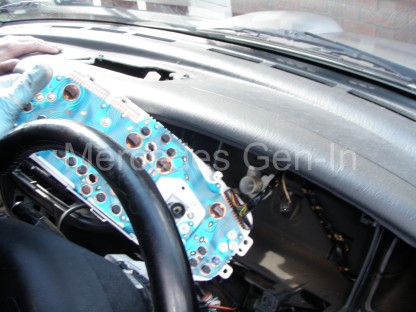
When you get to removing the instrument cluster, once the four screws are removed, pull the cluster forward, then unplug all the electrical connectors. The most difficult part is to remove the speedo drive receptacle. Unclip it from the back of the panel by pushing in the two retainers either side, pull the cable forward enough to clear the back panel and now for the scary bit! – Use a broad blade screwdriver and unclip the holder from the central circular part, this will take some force and you will think you are about to break the plastic – but it will unclip, eventually! It makes you sweat, much in the same way as replacing it a few hours later. But it has to come off or the dash cannot be removed.
Now continue to remove the main section of the dashboard from the passenger door opening. Do not forget that you don’t have to remove the steering wheel, although if your car is fitted with an air bag – disconnection of the battery is a must, as the passenger air bag will have to be disconnected and removed. Pry out the cover panel from the bottom, remove the two 10mm pins that hold the bag module to the crossbar plate. Lift up the green tab on the red electrical connector and remove the air bag plug from its socket. Withdraw the bag through the opening in the dash before continuing.
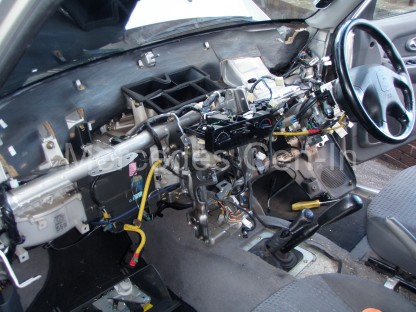
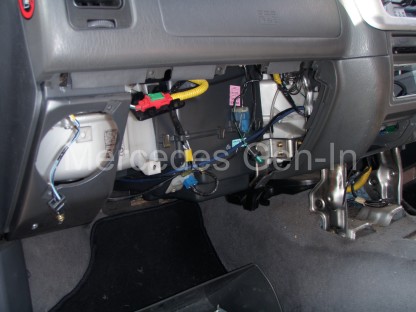
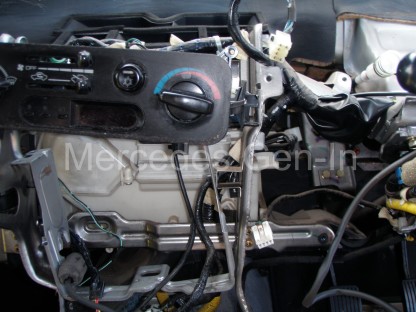
Now remove the vertical supporting metal framework, releasing the heater controls as you go. You can leave these connected but unplug the three electrical connectors and the left hand operating cable from its flap lever mechanism as the air-box assembly will need to be split and removing the cable to the blend door will enable you to remove the unit in conjunction with the centre heater box section.
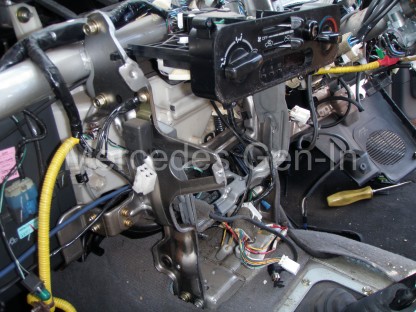
Remove the upper and lower plastic air ducts that connect air passages from the heater box to dashboard sections and foot area.
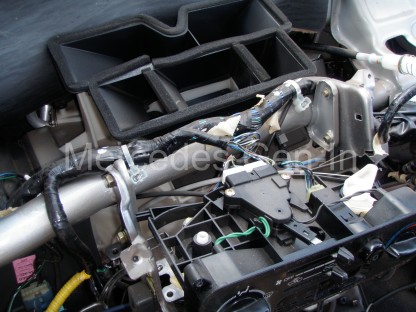
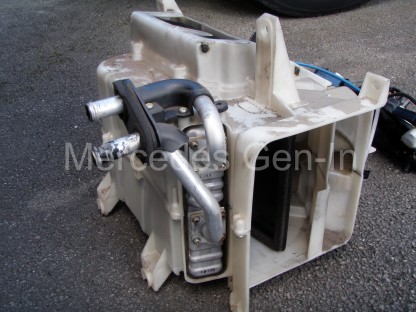
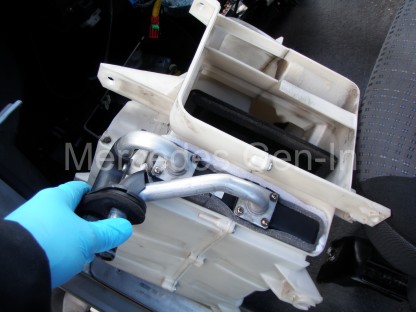
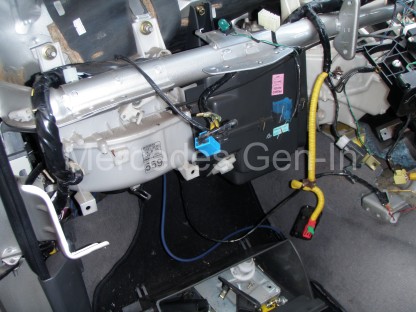
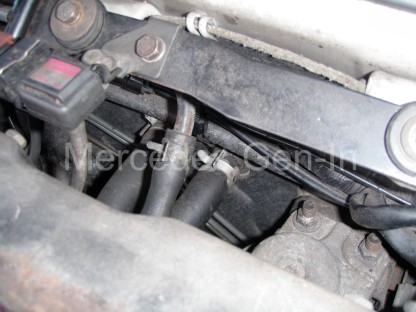
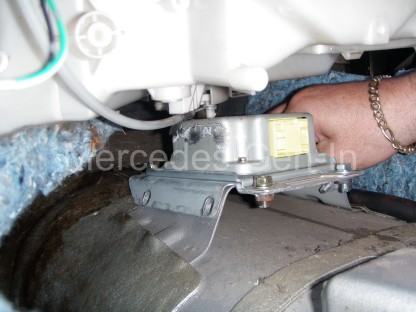
From the engine compartment on the firewall, remove the two hose clips and slide off the hoses from the protruding heater matrix pipes. Also remove the air-bag control module from under the heater box on the transmission tunnel, inside the cab. Undo all fixings from the three sections of heater box.
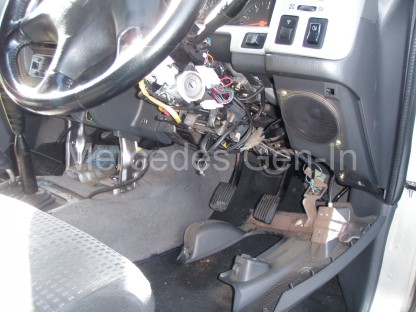
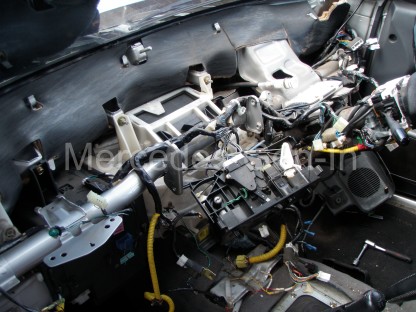
Begin by removing the heater box section to the passenger side first, this houses the blower unit. This will part from the black AC evaporator section with a little wiggling. Once this section is out, it becomes possible to move the AC section just enough left to allow the main heater box to be extracted, with the heater controls, more or less straight out from under the cross bar.

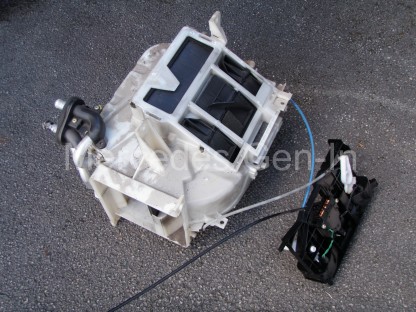
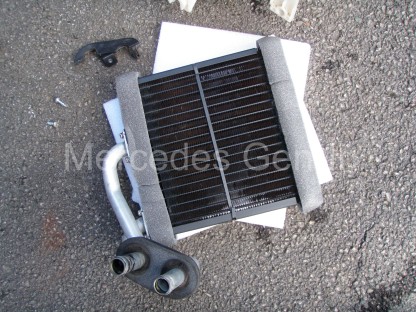
Once the central heater box and matrix is out of the vehicle, you can now set about replacing the leaking part. The replacement matrix will be supplied with new gaskets that may differ from the original in that they are a ‘square cut’ seal and not O rings. This is fine, but there is a plastic spacer you have to throw away that was originally fitted with the O ring type of seal, allowing a good seal to be made with the new square type rubber sandwich gasket. Also, depending on year, the matrix part you are supplied with (Anglo Scottish Radiators) could be slightly thinner front to back, if this is the case, simply ‘double up’ on the supplied foam sealing strip ensuring a good seal to the air box and preventing any movement of the matrix in situ. Once replaced, the newly fitted matrix inside the air box can be reinstalled.