For a few months the orange glow plug symbol had been illuminating and blinking on the dash, often it just went off on its own accord, sometimes it would need a restart of the ignition to clear it. I hadn’t really noticed anything wrong in regard to engine performance and drivability but it had become an annoyance.

As time progressed, the light would signal a limp-home situation where all turbo assistance would be cut and the whole driving operation would become a very dangerous experience very quickly! It always happened at the worst moment and would not reset with a toggle of the ignition – the only way to get home or onward with my journey was to rev the car repeatedly until it got really warm, then the performance returned, although the light remained, allowing me to get going again.
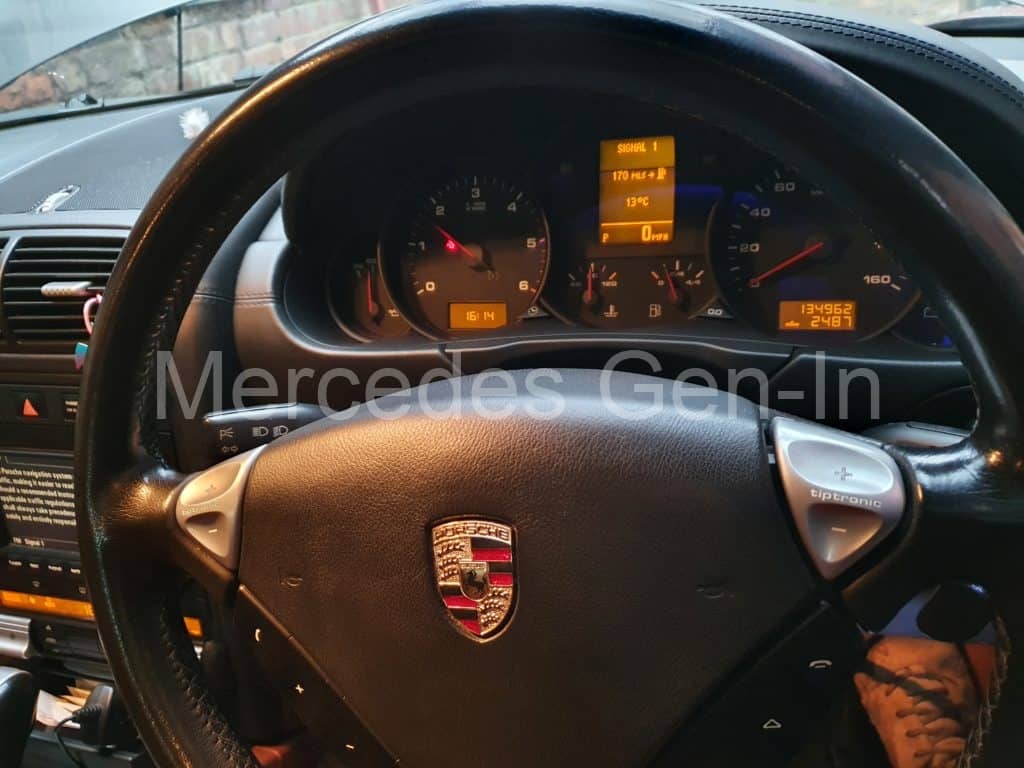
I had already guessed it was EGR related, but plugged in the Autel to confirm things. A P0403 code revealed my assumption to be correct, so lets get one ordered!
The best price pattern part EGR valve ( for VAG 9PA 3.0lTDI 2009-2010 EEP/AU/003A ) was from EBay at £125.00 including shipping, from a UK seller: jeep-chrysler, which was a very keen price indeed. Once the part had arrived I began planning the job. So many horror stories documented blocked/choked EGR valves and EGR coolers, all these scares filled my internet reading, along with numbers of people who had insisted on removing the EGR cooler and valve as a single assembly, which is a huge job and in many cases wholly unnecessary. My car had always been clean in regard to emissions, no soot, never smoked and always had clean tailpipes, so I found it hard to consider the EGR cooler was going to be choked, so wasn’t going to make more work for myself than was absolutely necessary – don’t fix what ain’t broke being the motto for the day.
Removal
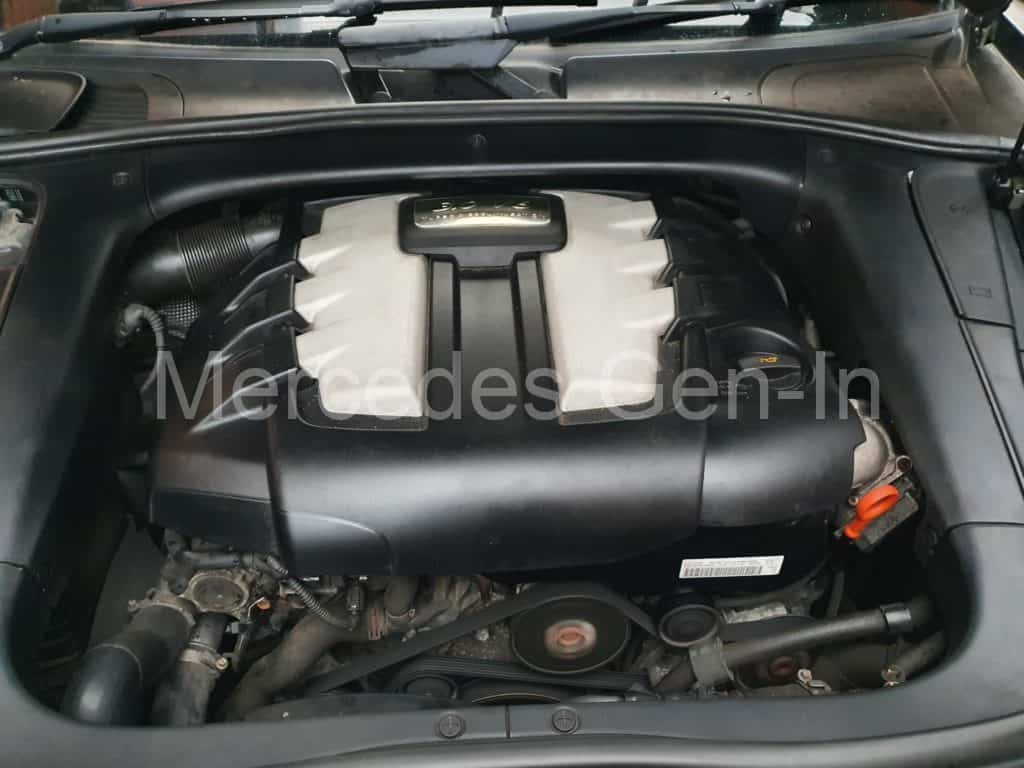
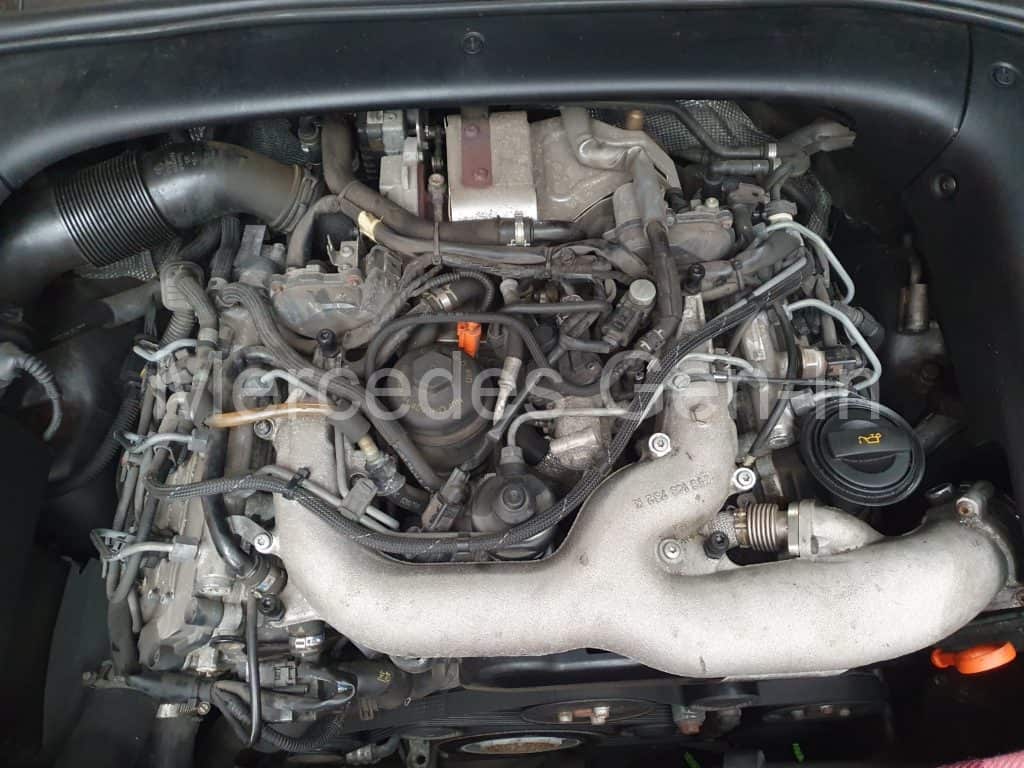
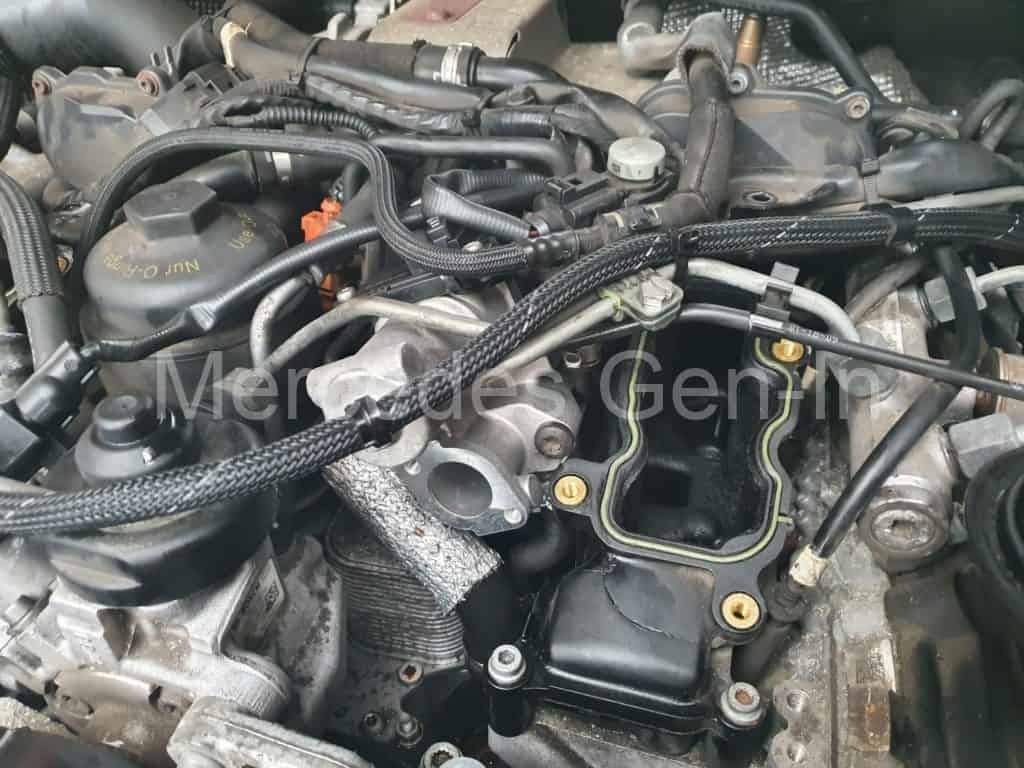
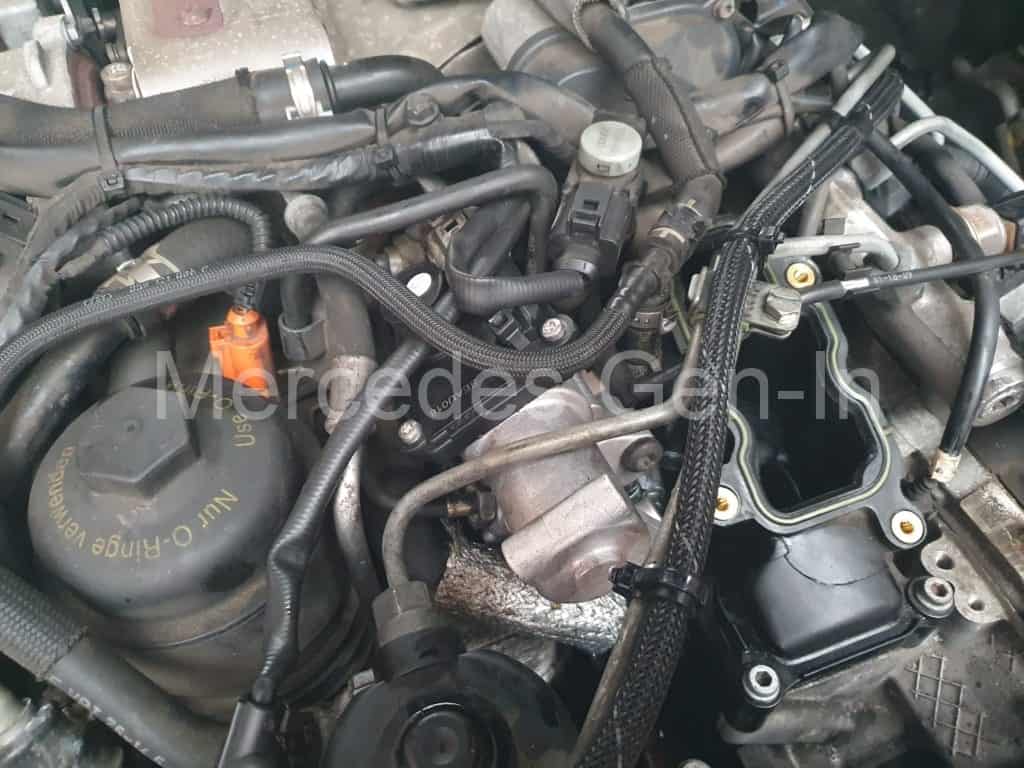
The EGR valve is placed slightly to right of centre. After removing the plastic engine cover, looking into the engine bay as shown in the picture below, it shows it well buried within the V of the engine, with one high pressure fuel line and a few cables traversing directly over it routed to the fuel rail.

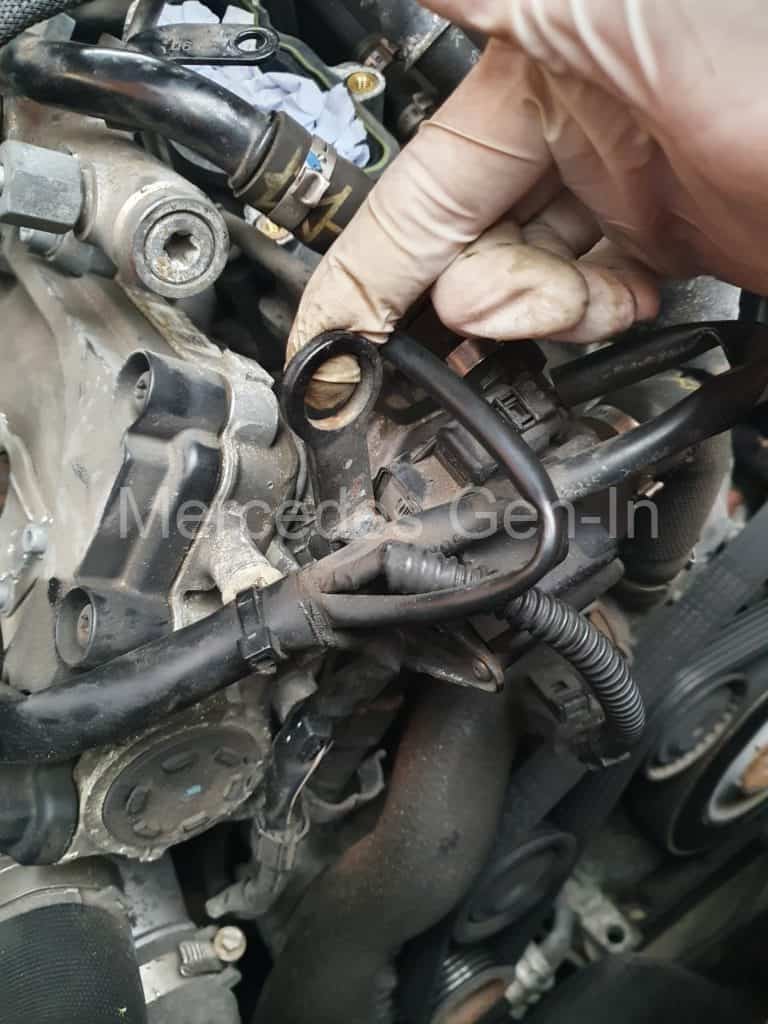
The upper cast aluminium inlet manifold is held in place to the thermoplastic lower left and right hand side manifolds with a number of torx screws, which once removed, along with the throttle body (a further 3x torx pins) and the EGR link pipe (2x 12 point set screws) disconnects it ready for removal. To allow inlet manifold withdrawal towards the front of the engine you will have to remove the pipe bracket and lifting eye as shown. Once the 2x 12 point screws are released from the engine block the bracket assembly can be pulled slightly to the left allowing the connected rigid water pipe and flexi hose to be moved enough to allow the left hand side of the manifold to move past it, pulling it forward. Now using a 12 point tip on a socket extension, slip it under the centre of the manifold and direct it to the 2x remaining set screws holding the EGR link pipe to the front of the EGR valve itself. Carefully remove these pins, and let the pipe fall slightly downward from the front of the EGR valve. Note there are stainless steel gaskets at each end of this short EGR link pipe, so be sure to recover them ready for replacement. This now will allow the manifold to slide forward, unhindered, with just enough clearance to remove it fully from the engine bay.
The first thing to do now is plug the openings to both inlet manifolds, one on either side, with rag or shop cloth to stop anything falling or entering the open inlets. Unclip the wiring loom connector from the EGR valve and vac solenoid, unclipping the loom that runs along the steel fuel line. Then remove the fuel line securing clip, being careful to retain its green silicone support block from under the bracket. Now use a 17mm spanner and undo the steel fuel line connectors from the back of the high pressure pump and its opposite end as it enters the left hand side fuel rail – remove and carefully store that pipe. Now there is just enough room to remove the EGR valve from the EGR cooler.
It is important to drain down some of the engine coolant, at least to a level below that which you are working. This prevents water entering the EGR cooler when the EGR valve is separated, finding its way down into the exhaust system which could cause issues with poisoning the catalytic converter material with antifreeze chemicals, so best avoided if at all possible. Plus it makes working in the engine V a little more bearable without it being flooded with coolant, as any water does not drain away well from this location. Remove the upper hose clip from the small vertical rubber hose that connects the EGR valve to the head, sliding the hose down, off the brass spigot with a broad screwdriver. Now remove the 2x long torx set screws that are on the front face of the EGR valve, these attach it to the EGR cooler with a single metal gasket between the two parts. Once the long screws are completely removed, you would have imagined the valve would just pull from the face of the EGR cooler. Wrong. The EGR assembly (valve and cooler) is all fitted on top of a steel frame that straddles the engine V. There is a single 10mm head hex bolt that fixes through that bracket upward into the front left hand side of the mouth of the EGR valve. Rotationally wiggling the valve, clockwise and anticlockwise about this fixing point will loosen it enough for a stubby 10mm open ended spanner to be inserted under the plate and painstakingly undo the fixing pin. You will not lose the pin! – it remains captive between the bracket and pancake cooler it sits above. I had to sacrifice a cheap open ended 10mm spanner and cut it down to about 3 inches long, to enable me to get the job done. It may be necessary to hold the one inch rubber water hose to one side that is located in the vicinity, but with patience, it is very possible to undo this bolt and its far easier than even the contemplation of removing all that would be required to take out the complete EGR/cooler assembly. Of course, you may wish to leave replacing that bolt on the rebuild, but with a bit of swearing and some nimble finger work I managed to replace it, finally fully tightening it into the new EGR valve with my cut-off spanner – you may have somewhat less patience!
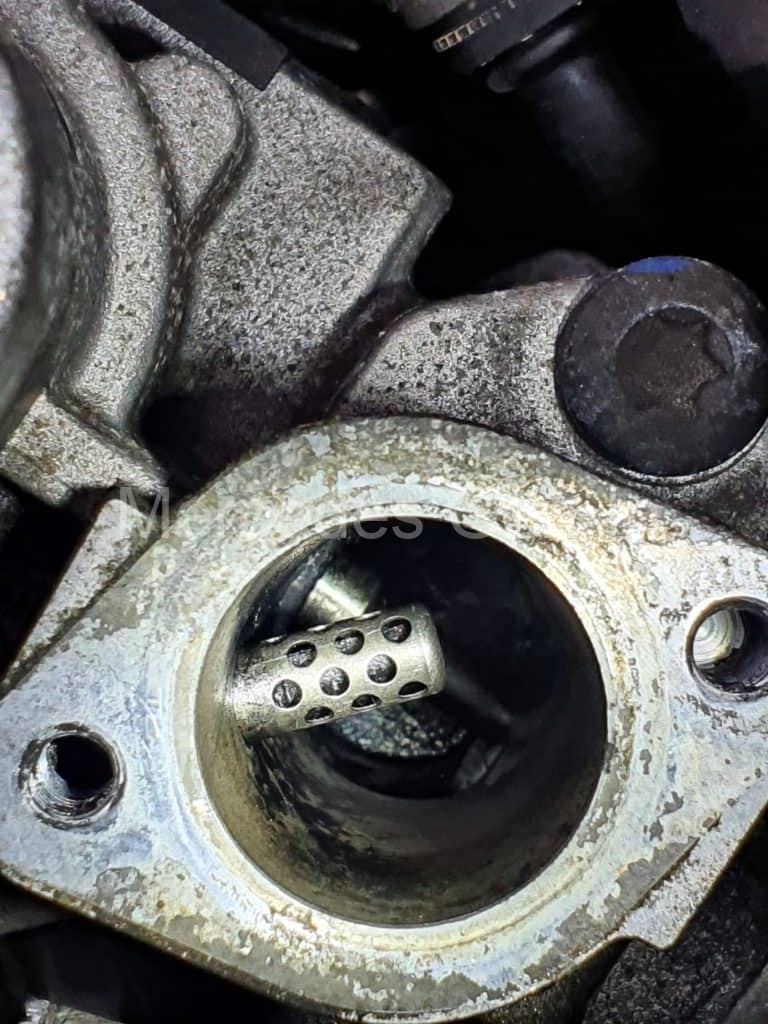
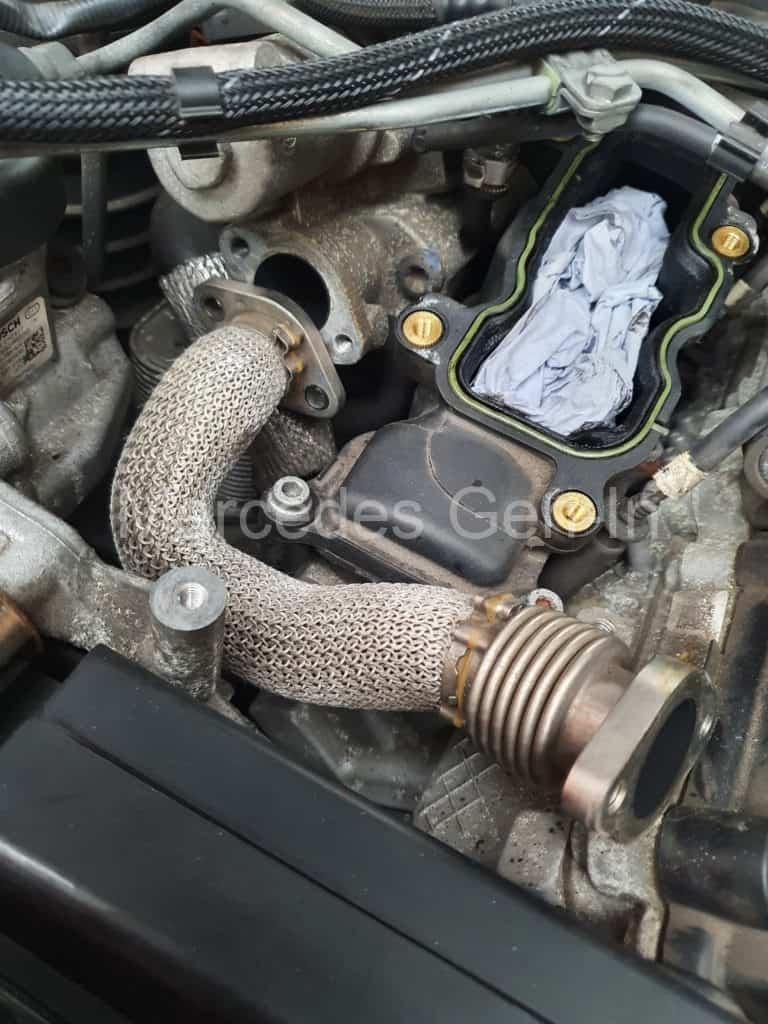
Now all the fixings have been removed, the EGR valve can be orientated out of the hole where it lies, revealing the opening to the EGR cooler, which was very clean and clear of record soot and gunge, so I was correct to have only needed to remove/replace the valve and not the cooler. Clean the mating face of the EGR cooler, ensuring the cooling water feed holes are clear of any corrosion around their edges. Recover and clean up the stainless steel gasket ready for rebuilding.
Rebuilding
Use a light amount of silicone based gasket sealer on the face of the EGR cooler, both faces of the steel gasket and on the rear face of the new EGR valve. Letting the silicone almost dry and become very sticky, press (Glue) the steel gasket onto the EGR cooler. Pressing this firmly in the correct place will allow the safe rebuilding of the assembly, keeping in perfect alignment the bolt holes and coolant water supply chamber as you refit the valve. Once the valve has been refitted, replacement of other components is much the same as removal, just take your time, remembering to refit the small coolant hose beneath the EGR before starting to refit the EGR link pipe as usable access will become impossible as the rebuild progresses. Be aware that air will be let into the direct inception diesel fuel system by removing the feed pipe from the pump and fuel rail. Remember to refill the coolant system with antifreeze mix to the correct level, before attempting to run the engine up. The car may need some extended cranking to rid the air in the system allowing the engine to start. Don’t let the engine crank continuously as this will rapidly overheat the starter motor. Turn the ignition key off after 20 sec bursts of cranking and wait 30 seconds before a retry. Eventually the engine will burst into life.
Don’t forget to clear the stored fault code in the ECU, check the coolant level and check your work. Replace the engine cover and let the engine run up to temperature. In my case as there had been an issue with the EGR circuit for quite some time, the automated catalyst regen had been held off, now having a fully functional emissions control system resulted in a very long awaited, smelly and much needed regen!
The complete job was completed in about 4.5 – 5 hours with tea breaks.
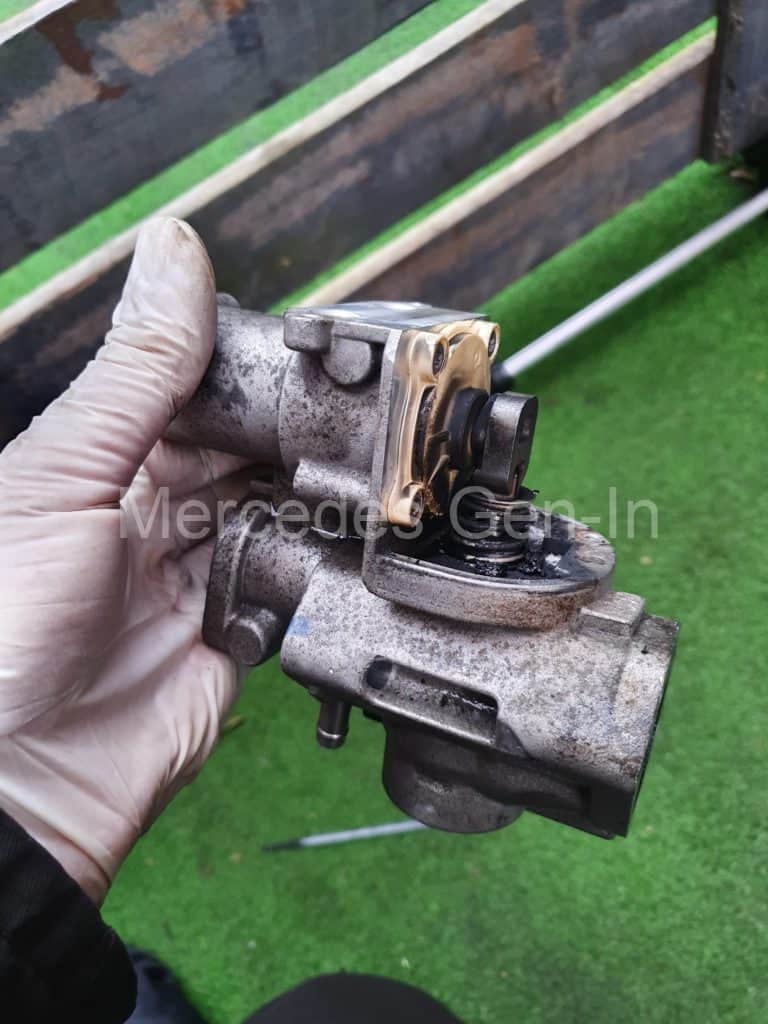
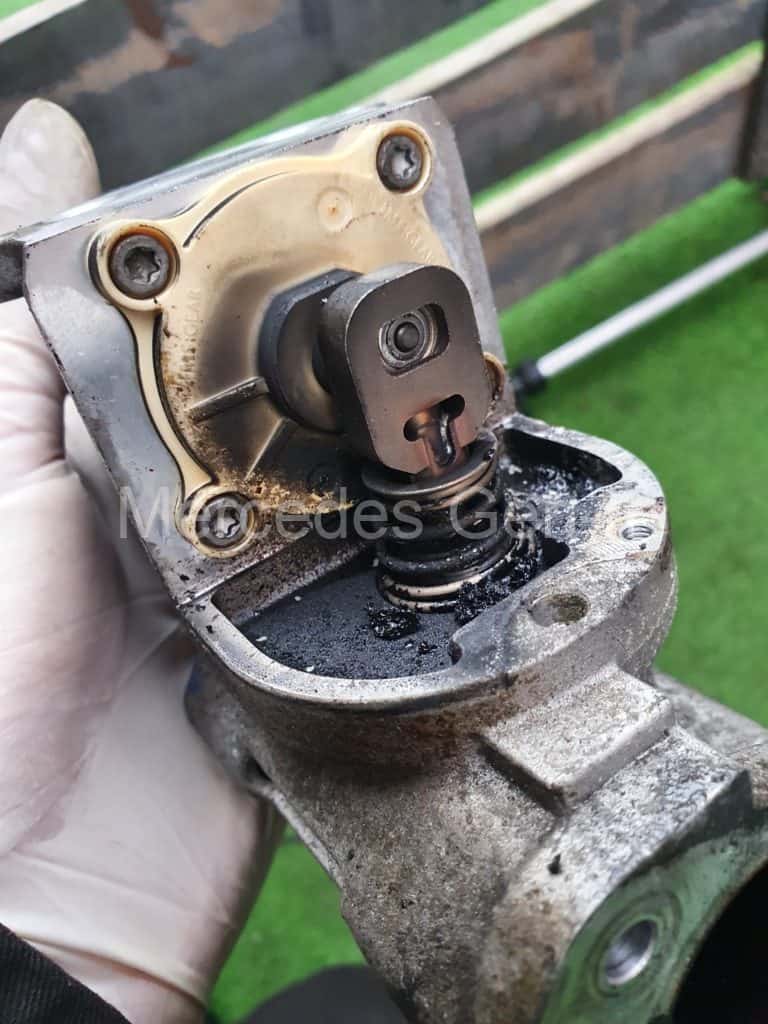
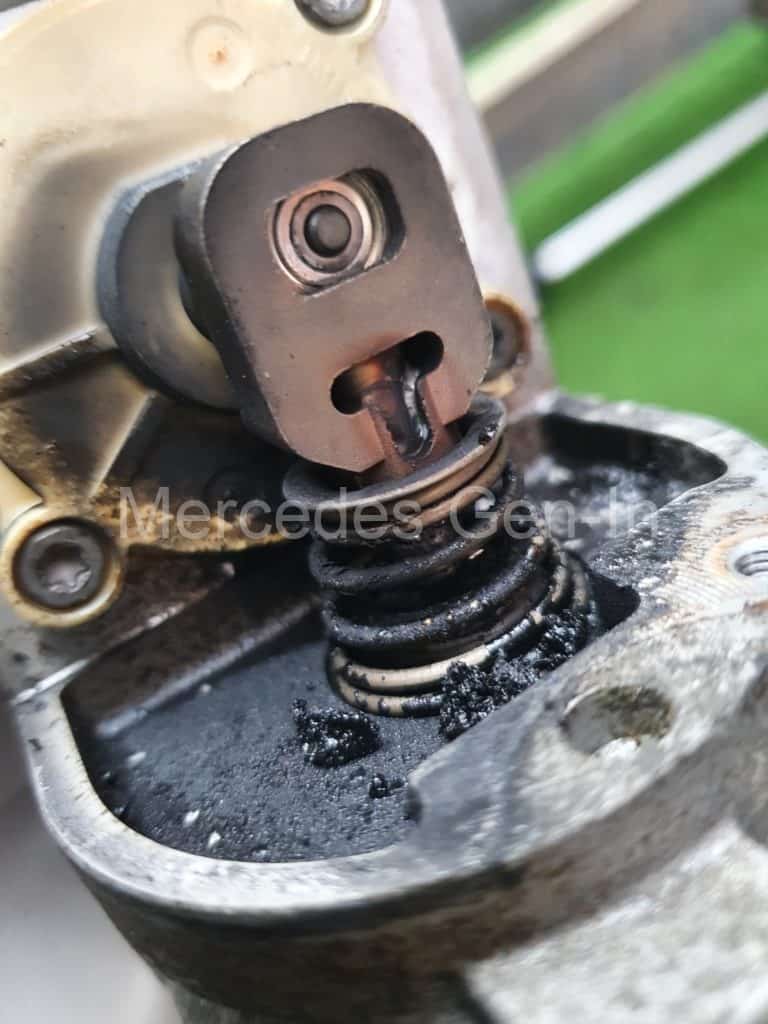
Everything is now working perfectly! The only thing left to do was conduct an ‘autopsy’ on the failed component. Photos below. You can see how soot ad started to enter the motor housing, gumming up the operation of the operating mechanism and EGR valve shaft.