General Non-related MB

Items and posts unrelated to MB

Mercedes Sprinter / VW Crafter simple bodywork repair

If you own a commercial or working vehicle, from time to time you will without doubt attract the odd knock or bump along the way that adds character to your van.  Not everyone wants to pay premium bodyshop prices to rectify these scars and in many instances its just a matter of keeping the van respectable and not looking like an old hack.

For this reason I have added this post, hopefully to give you some confidence to carry out your own simple bodywork repairs, especially if it is something you have never tackled before. Before we begin I will point out that any DIY repair will often fall short of professional refinishing to that showroom standard, but if you are looking to tidy up a few knocks and bangs to a reasonable ‘working vehicle’ standard then read on…

Any length of time you invest in putting right bodywork wrongs, is directly proportional to the quality of the end result. It is worth remembering that a ‘quick-job’ will more than likely look like one, so be prepared to spend some time to do things properly and get the best results you can.

Mercedes Sprinter DIY Bodywork Repair

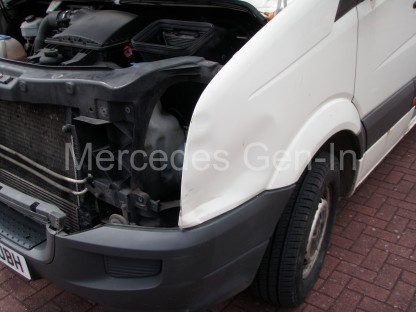
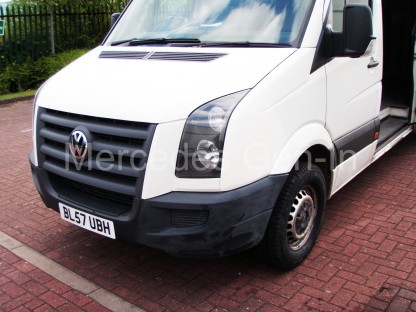
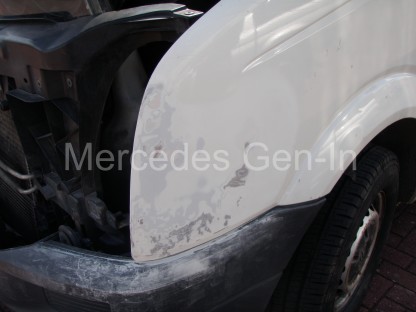
One of my clients drivers made a clumsy turn-round manoeuvre in one of the LWB Crafter CR35’s and being one of the tidiest and latest vehicles on the fleet it seemed a shame to leave it in a state of disrepair.  The price of a good white painted second hand wing was in the order of £250 and a 100 mile round trip to collect – not what he was looking to pay.   Any professional body repair work would mean time off the road for the vehicle and currently this would not be possible, so I offered to to rectify the damage over the weekend.

Mercedes Sprinter DIY Bodywork Repair 1

Here you can see a photo of the initial damage, fortunately the lamp assembly was not in any way broken so the repair was confined to the wing panel itself.

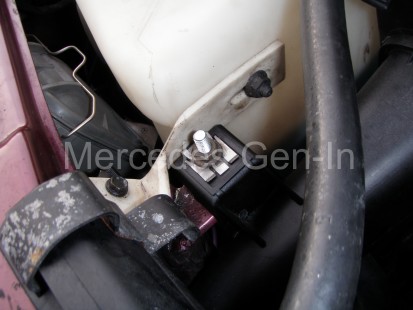
Half the battle of any body repair is having some kit to help you, this will not cost you the earth and it will always be on hand for any future jobs that you may wish to take on.  The remaining half of the battle is having the ‘balls’ to take on the job of physically hitting out the dent – especially if its something new to you.  What you have to remember before you start is – you can’t make it any worse really can you!

Mercedes Sprinter DIY Bodywork Repair 2

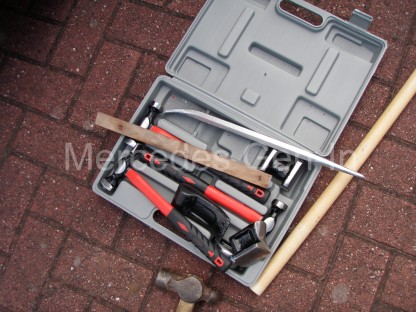
I use a cheap and cheerful Panel beating set from Machine Mart, costing around £35 for a comprehensive set of hammers and steel dollies. As I am no panel beating or bodywork expert, this is about the maximum I am prepared to invest to get the job done.

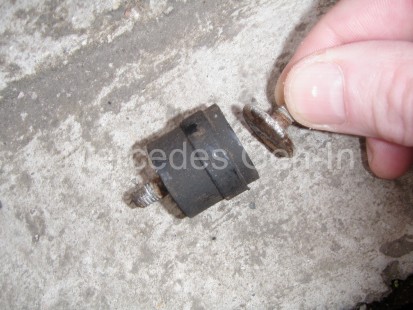
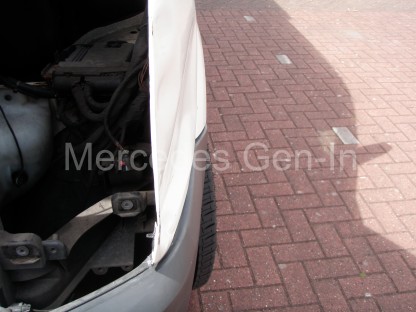
First I removed the grille, headlamp assembly trim panel and lamp unit.  This revealed good access to the back of pretty much all the area of damage.  This is ideal.  If the dent you wish to get at is further back, then you would probably have to strip out the plastic wheel liner and remove the road wheel to gain suitable access.

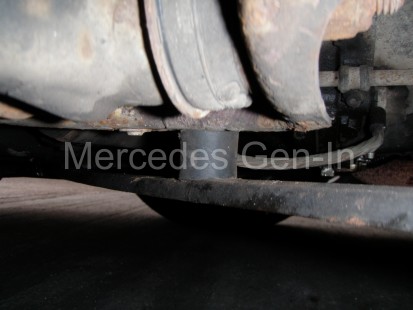
Holding a steel dolly on the outside of the wing, strike the inside of the wing/dent to start to bring it outward.  Don’t worry about over-bending it slightly at this point as you can aways dress it back.  Moving the dolly about to absorb the hammer shocks, try and model the wing to its original contours and shape.  Once the outline shape starts to recover, reduce the force of your hammering and begin to strike the point where the dolly touches the point on the surface of the outer wing.

Your hammering sound will change when you start to hit the correct point, it will begin to ‘ping’. This means you are striking the metal perfectly, sandwiched between hammer and dolly, flattening the rippled and dented steel as you proceed. If your dent is horizontal, work vertically in lines, up and down over it to work out the kink in the metal sheet, if your dent is vertical, do the inverse.

You will soon get the hang of tapping with the flat faced hammer and deforming the metal, flattening it onto the dollies.

Mercedes Sprinter DIY Bodywork Repair 3

Take your time, use the range of dollies in the kit to access all the areas needed, use the wedge dolly on the panel lips and edges and the flatter anvil types on the more linear surfaces.  The original shape will begin to emerge.  Any high spots on the outside, reverse the hammer and dolly to knock the panel in onto the anvil, working from both sides of the steel where necessary.  There is a great little web article on Panel Beating for Beginners here should you wish to read up a little more before you attempt your repair.

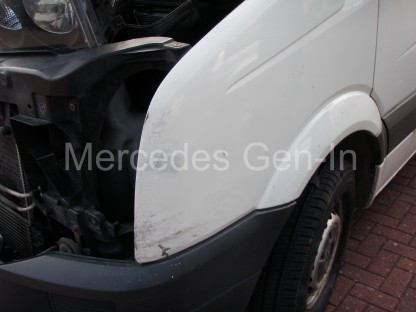
It should be possible with careful work, to get the shape of the original wing back without the need to use large amounts of filler or bonder. To be truthful, only a light skim of filler to flatten any imperfections should be what you are looking to achieve in your panel beating.

Mercedes Sprinter DIY Bodywork Repair 4

Test the fit of any components that may have a closing or butting edge to your work, be sure that everything aligns as it should.

Now rough-up and sand the repair surface with abrasive paper and a block, you will begin to see any high/low spots, re hammer if needed.  Apply a thin coating of filler where needed and sand flat when hardened, any imperfections address with more filler and sanding.  Work your way down in abrasive paper coarseness to obtain a smooth paint ready surface.

Suitably mask off any area that is likely to be subject to overspray. Be sure to use a primer of similar colour base to the top coat e.g white primer for white, grey for blacks and blues, red for red and so on.  It makes a difference to coverage and the final shade of top coat, so choose with some care.  Be sure to sand down each coat of primer to a smooth finish.  The primer itself will begin to fill small imperfections in readiness for the top coat, each coat of primer improving the chances of success with the top coat factory colour.

Mercedes Sprinter DIY Bodywork Repair 5

Wipe down the area and try to make it as dust free as possible before spraying with the factory colour.  Only apply light coats and let it dry between sprays, building a good thickness of paint is important that can eventually be cut back and polished.  Use a good coating of paint, I used almost a full can of top coat on this small area, this allows for any flatting or buffing without wearing down to the primer coat.

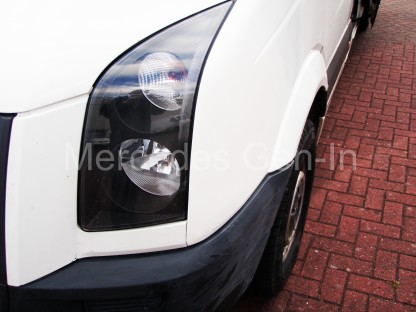
After leaving to dry for a good couple of hours you may begin to carefully build up the rest of the van, grille, headlamp and so on. Do not attempt to work on the paint for a least a day has passed, as it remains soft, even if dry to the touch, for several days before it is fully hard.

I think you will agree that the repair was a success and in actual cash value (not counting any time) it cost £60 to complete, this includes the tool set and materials.

Mercedes Sprinter DIY Bodywork Repair 5

Slight vibration heard when applying slow speed steering lock – Mercedes SL (R129)

Mercedes SL (R129) Rubber bobbin bushes

When I last went to the tyre shop the fitter drove the car into the bay, as he manoeuvred I heard a low frequency vibration from outside the car.  It was like a flapping vibration, two parts vibrating against each other and it was quite loud.  I knew it was nothing to to do with the auxiliary belt or its tensioners as I already inspected these components and found them to be sound.  So what was it…?

Mercedes SL (R129) Rubber bobbin bushes 2

It wasn’t until a few weeks later when I was replacing the steering idler arm bushes that I noticed the metalastic bush (rubber bobbin) on the front cross brace on the passenger side had deteriorated and parted company.  It was not instantly visible as faulty as the tension that is placed on the bush pushes the parts together so it can’t easily be seen.  Just give your bushes a little pry to see if they have parted company with the bonded threaded sections.

The cross braces run from the centre of the car, under the engine, to just behind each road wheel in a diagonal formation.  They are securely bolted fore and aft to the chassis with a single bobbin type bush in the centre run of each.  The bush is bolted to the brace then upwards to the chassis and I suppose is in place only to prevent it vibrating or flapping over its length – precisely the issue I had.

Mercedes SL (R129) Rubber bobbin bushes 3Mercedes SL (R129) Rubber bobbin bushes 4

I searched for replacement parts (bobbins) and was horrified to see that they were priced between £8 and £12 per bush!  Now, although I don’t mind buying parts that are required, I just think this is a ridiculous price to pay for what is in effect a piece of rubber with two threads on!  Especially as it was a non-critical part.

Searching deeper for an alternative I caught sight of a supplier in Hong Kong advertising the correctly dimensioned bush for 0.99 pence including delivery – thats more like it!!  Link to product found here

Mercedes SL (R129) Rubber bobbin bushes 5

Ordering six bushes I only had to wait two weeks and the package arrived.  Six bushes of what looked good construction and quality just what was required for the bracing bars. I then remembered the air box support bobbins had gone the same way and by chance the parts ordered also fitted this application perfectly.

Mercedes SL (R129) Rubber bobbin bushes 6

So for £6 I had repaired/replaced the two air box mounting bobbins and those on both bracing bars, plus two spare!.  As suspected the flapping sound of the bracing bar, induced by the pulsing of the power steering pump at low speed had now gone – Success!


Mercedes front wheel bearing noise – or is it? – Tyre Choice

Here is a little gem of information that as Mercedes Benz owners you may or may not be aware of regarding a common occurrence that has presented itself many times in my personal experience maintaining and servicing MB vehicles.

C200 tyre noise

Correct tyre tread pattern choice will often improve your vehicle rolling noise and in some cases – A switch to the correct type will often ‘cure’ mechanical worn out bearing sounds!

If you are like me and are ‘in tune’ with the noises your car produces in the normal course of driving, you may be aware that tyre choice is fundamental to the quiet running of a vehicle.  None more so than in the Mercedes Benz range.

I recently test drove a 75ooo mile young, C200 2004 model, in excellent condition and I would have been convinced that the noise from the front off side was a worn wheel bearing in the latter stages of its life.  As usual it turned out to be a poor choice of tyre on that corner of the car.  So many times have new owners of used Mercedes vehicles described an annoying ‘drone’ and are convinced it is a worn out rotational component such as a wheel bearing, when actually it turns out to be nothing more than a poor choice of tyre fitted to the car by someone who does not know any better (or the used car dealer fitted any ‘odd pattern’ of tyre to the vehicle to make its tread depth attractive to the would be purchaser).

The truth is that MB make quiet running vehicles and resonances are often heard that would normally be drowned out by road and engine noise in lesser vehicles – that’s why new owners regularly pick up on the odd noises that play above the serene quiet inside their passenger compartment.

The outline details below are from my own findings and experiences, I am neither promoting or slating any manufacturer of tyre, nor am I suggesting that every tyre of certain types and tread pattern all produce the same noise issues, they may not – however, quietly ask a well informed reputable tyre dealer and the chances are that he will impart to you the exact same recommendations.

The worst offending tyre to generate ‘wheel bearing type noise’ on the front of a Mercedes is the aggressive ‘V’ tread pattern that is often seen on modern tyres.  As a rule the cheaper the tyre – the worse the noise!  Their tread pattern looks very similar to this:

V Tread Pattern

V Tread Pattern


The next high ‘noise’ offender is the Winter or All Weather tyre, with its much smaller tread features moulded into larger segmented tread blocks placed again in a ‘V’ pattern, rather like the one shown below:

Winter  All Season Tyre

Winter All Season Tyre – Block Pattern

Both of the tread patterns above will more often than not give increased rolling road noise and in some cases a very pronounced ‘humming’ noise on all road surfaces, this often gets progressively lower in frequency as you brake to a halt or roll to a stop line.  A far quieter, better choice of tyre would be ones with a more ‘radial grooved’ tread pattern that rings the complete circumference of the tyre as opposed to the noisy ‘V’ or ‘Block’ sections above. See below for good choice tread patterns.

20130624_172305

Maxxis Economy Tyre

20130624_172320

Pirelli Premium Tyre


The tyres above represent tread patterns that are far more favorable to the quiet smooth running of your Mercedes Benz vehicle, it does not have to cost a lot to get the best from your tyres, just an informed choice of what style of tread pattern you should be selecting at purchase. Past experience with both the ‘E Class’ ( W210, and  W211 Chassis ) and ‘C’ Class model ranges has proven this time and time again. Often if I suspect that there is a tyre problem or the possibility of a worn wheel bearing I will quickly switch the tyres front to back if they are a different more forgiving tread pattern, to see if the noise changes or disappears.  It often does, and by changing the rubber set up on the car will frequently cure the suggestion of any other mechanical defect.

Try it out for yourself if you are in any doubt, whats to lose? – it could save you some money in unnecessary garage bills !

Mercedes Rust – The opinion of road salt corrosion from the Un-Salted of America

I was browsing some Mercedes related YouTube productions and came by this one.  A as a resident of the UK it gave great amusement.  How it must feel to be able to select a vehicle that has never seen road salt and drop like the proverbial ‘Hot Potato’ another that has.  This is an American Mercedes enthusiasts view on vehicles subject to road salt, just imagine what it would be like to have the option to choose a used car that has never seen road salt – so to all in the UK and some parts of Europe – enjoy the video from the Un-Salted of America!….. it made me smile. Laughing

Do remember check out more of Kent Bergsma’s ‘Mercedessource’ excellent YouTube content, absolutely loads of DIY information and pictorial demonstrations from this Mercedes Benz enthusiast, all produced in super quality.  His truly fantastic list of free video resources can be found here – http://www.youtube.com/user/Mercedessource?feature=watch

Kent now has a new website where you can actually purchase on-demand repair tutorial videos. Useful if you need that insider information from a reputable source. https://mercedessource.com/store/search?keys=&location=All&chassis=All&type=video&category=All&=Search

There is also a fantastic range of .pdf downloadable manuals and documents covering specific maintenance tasks on modern and classic Mercedes cars, view the full range here: https://mercedessource.com/store/search?keys=&location=All&chassis=All&type=file&category=All&=Search


Mercedes Benz Registration Plate Frame – Installation

Unsure of the outcome of the pending insurance claim on the Mercedes E320 CDI I decided to transfer the registration plates to the Vito to cover me in the event the insurance company declared my car a ‘total loss’ and switching plates became more complex overnight.

Mercedes Vito W639 Registration Plate Frame

Having removed the original plates from the Mercedes Vito I decided to clean up the area and use some new mounting frames for the fresh plates. A quick scan on the online auction sites drew my attention to these.  They seemed cheap enough and of reasonable quality, I thought I would give them a go.  I was skeptical as to whether they would be any use as out of all the reviews of previous purchasers there was one who complained and stated they were ‘rubbish and binned them’ – being objective and not expecting the world for what I was about to pay for a pair, I took the plunge and glad I did!

Mercedes Registration Plate Frame

From placing the order to delivery through the letter box was two days, I was pleased with the packing and the frames looked well when I inspected them.

Mercedes Registration Plate Fixing

To fit the rear plate, open the frame by springing the clips and open it up (hinged). Use a little double sided sticky tape on the back edges and other broad plastic sections to give a nice firm mount when fixed with the two original screw in Mercedes door fixings.  I used plastic screw caps to provide a larger surface area for the screws to tighten down onto the frame.  These did not affect the fitting of the reg plate as they fell below the back plate supports.

Mercedes Benz Registration Plate Mounting Frame

Once fixed, tuck the reg plate under the lips provided in the top of the inner frame.  Pull down the four sprung bottom retainers that have a further lip that secures the plate snugly to the back plate.  Making sure the reg plate is central in the frame, close the door downward and snap the fixings closed.  Job done !  Same routine for the front plate, other than to add extra fixing screws in the extreme four corners to allow a more rigid mounting of the frame – this is really important, as the frame would otherwise get easily caught when washing the vehicle etc.

Registration Plate Fixing Clips

A nice simple task that took less than 20 minutes to complete and I think looks a very tidy job.

Mercedes Vito W639 Number Plate Frame