A customers Sprinter MWB van pulled onto the yard and as it slowed to halt it made a loud metal-on-metal scraping sound. The driver leapt out and explained the noise, which really did not need any explaining! He had just ‘popped in’ to get it fixed before he continued on his 150 mile round trip delivery run before the closedown for Christmas.
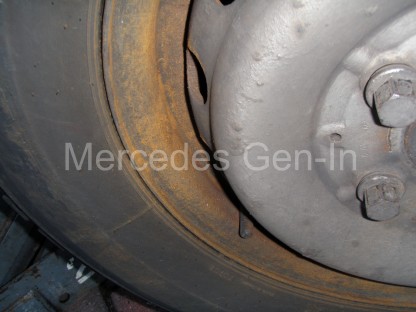
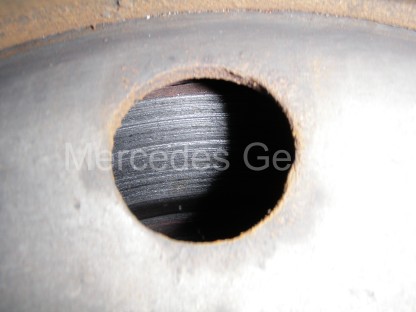
Looking at the rust coloured dust deposited on the front wheel rim it was obvious it was the front pads that were ‘non-existent’, closer inspection revealed that the near side pad set was so worn the steel backing had begun to score the outer face of the brake disc. With little to no time to do a complete repair, the object was to get him safely on his way and revisit the repair with ordered and supplied replacement brake discs in the New Year. So a quick pad change was needed… Hopefully this will explain how to do this.
While the vehicle is still on the ground, use your ‘weapon of choice’ on the wheel studs. In our case this is a 1 inch drive socket bar with 19mm socket and long ‘slipper’ tube for extra leverage . It was used on both front wheel bolt sets before lifting the vehicle with the trolley jack. If you get a stubborn wheel bolt, take the largest hammer in the tool box and hit the head of the wheel bolt ‘square on’ as hard as you can at least a couple of times, try again with the bar and often this is all that is needed to free off the bolt.
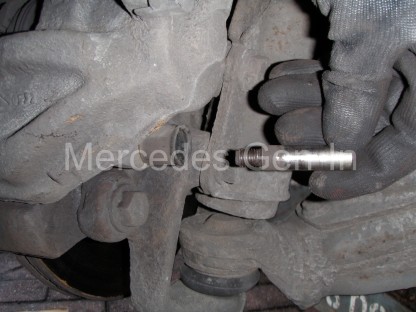
Once in the air, (A good safe place to locate the trolley jack cup on either side, is under the triangular steel spring clamp plates bolted to the front subframe) take off the wheel and turn the steering to orientate the brake caliper as far out from under the wheel arch as possible. Pull out both upper and lower bungs from the ends of the slide pin rubber weather shields at the rear and using a 7mm hexagon wrench undo both slide pins and remove them.
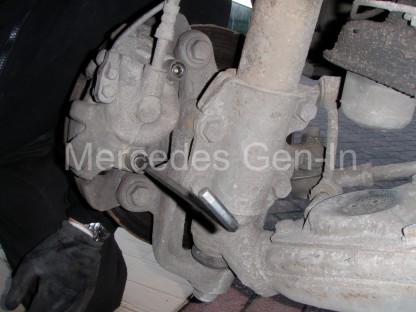
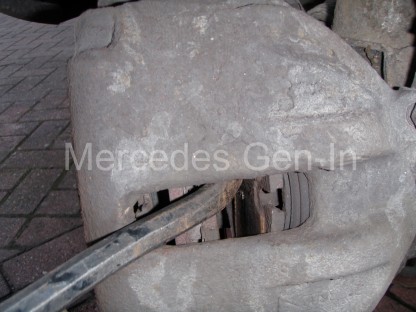
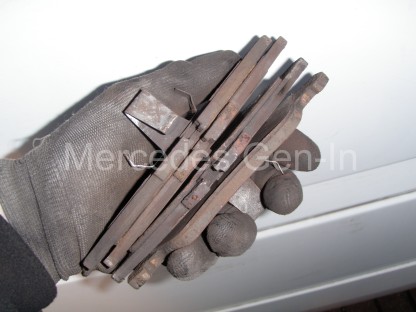
Using two stout screwdrivers release the rattle spring from the face of the caliper by prying it away from the disc while releasing the hooked ears from their locating holes in the sliding portion of the brake (two photos down). Once removed place to one side. Again use a stout screwdriver or lever to push back the hydraulic piston into the caliper. Once this is almost flush with the casting, you are assured that the new pads will slot straight in without problem.
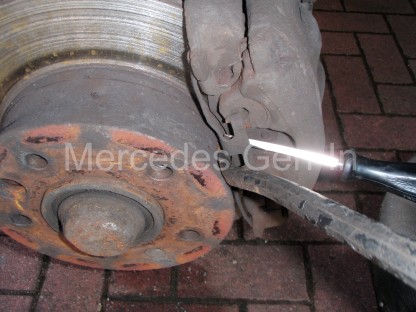
Remove the sliding part of the caliper and place it on the top of the steering knuckle so that the flexible hose is not stressed in any way. The inboard brake pad will still be attached to the caliper piston with a three pronged spring affair. Simply pull out the pad from this locator and discard it, do the same with the outboard pad that is probably still sitting in its slots on the hanger casting. It is worth cleaning the rust from the brake disc at this point as the new pads will bed in quicker. You can do this by striking gently the outside edge of the disc working your way around its circumference to break away the accumulated scale and rust, finishing off with a file to remove any lips formed on the braking surface. Finally clean off with a scraper or wire brush the sliding surfaces where the pads touch/rest on the casting of the caliper and then apply a thin smear of brake grease to these points. In this case, as I was to be revisiting the repair in just a few days, I did not use any grease and just slotted in the new pad set.
Offer up the caliper sliding section and when it is fitted snugly, replace the two slide pins using the 7mm hex wrench. If the slide pins are dirty clean them up with a wire brush and also apply a light coating of brake grease before assembly. Tighten both slide pins and replace the plastic bungs. Now replace the rattle spring, locating it into its two holes and making sure the two long sprung arms of the leaf spring are located behind the fixed part of the carrier (the hanger) to apply the necessary pressure.
Hop into the cab and ‘pad’ the brake pedal in short pumps to seat the pads against the disc, and then check your work. Once satisfied replace the road wheel and lower the jack. Continue to change the pads in the other side to complete the job.
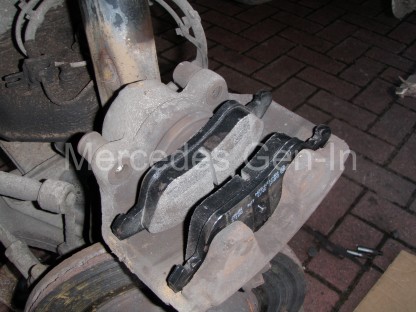
In this case the brake disc is badly scored and really should not have had just pads fitted without replacing the brake disc itself. Bedding in time, pad wear and brake efficiency will ultimately be effected. Just replacing the pads in a situation like this should only be done in a ‘get-you-by’ situation and driven onward with care until the earliest time you can replace the discs/pads as a set. (You will also need yet another new set of brake pads to compliment the fresh brake discs you will be fitting)
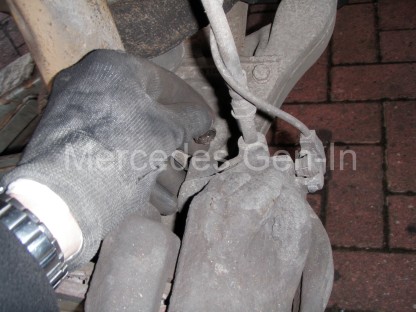
There is fitted to this model and all Mercedes vehicles, a pad wear sensor, this had a broken wire at the caliper and because it is of the earlier single wire type, no dash indication of ‘pad-low’ was shown (the indicator relies soley on the single sensor wire contacting ground to illuminate the dash lamp, this would happen as the pad wears down below the pocket in the pad material where the sensor tip is located, eventually touching and grounding it to the brake disc surface). The later ‘two wire’ sensor versions, as fitted to 2006 on vehicles NCV3 Sprinter and W639 Vito etc, display a lamp if the sensor circuit is broken or grounded, which in turn reduces the chances of the above occurring without warning. See this posting on wear sensor replacement.