
A Common fault with the Mercedes C Class instrument cluster is a dimming of the orange LCD multi-function display. This fading often gets worse when the car is hot or has been out in the sun all day. The usual places to show the fault are the auto gear selection and W/S icons top right and the lower and upper edge, in some cases totally obscuring any information that may be displayed. When the car is cold, the display often works better for a time and appears of reasonable contrast only to later fail as temperatures rise.

Fading Mercedes Display
The LCD unit itself forms part of the instrument cluster and can be removed and replaced. The negative is that the LCD unit is not available as a spare part (you have to buy the whole console!) The special LCD is manufactured by Motorola (Part number HLM7804) and is common part used in all variants of the C class dash with the arched speedometer and MFD.

Mercedes instrument cluster removal
So what to do… Buy a new speedometer (lots of cash) or a used one (incorrect odometer reading)? Or swap out the display from the cheapest used one you can buy !
To give an idea of the cost of a used instrument cluster from a breakers they are usually about £65 to £95 GB pounds. The online auction sites are a great source of cheap parts and if you are prepared to scour the listings you will find a bargain. You have the advantage of being able to choose any similar instrument cluster, not bothering about, model year, petrol or diesel types, engine size, 4 or 6 cylinder etc… This gives you the edge! Just buy the cheapest you can find. I managed to pick one up for £30, advertised with a photograph showing the display clearly illuminated still fitted to the car!
UPDATE – It appears there is a company who specialises in the supply of display ribbon cable kits for various MB models here. Also there is another company, probably in China who can supply the complete W203 display with bonded cable here (Also other MB and car models it seems) I have not used either company but I thought the links may prove useful.
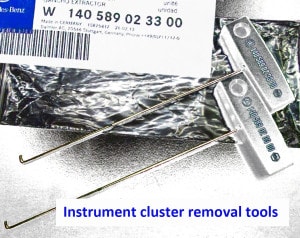
Now to replace the display, this is a simple task and can be done with only a length of welding rod, a small screwdriver and some care.

How the instrument pod latch works
First remove the instrument cluster from the dash, slide down a length of welding rod into the apertures each side of the binnacle, the rod will push onto a moulded latch mechanism, as it is inserted (about 10 cm in) it releases a retaining clasp. Once this is done, hook into the top of the slot a small hexagon key and pull the cluster gently out from the dash, each side at a time. Set the steering wheel position adjustment – fully out and down to give you maximum working room.

Mercedes C200 Instrument cluster connector

Mercedes C200 Instrument cluster latching connector
Draw the pod forward enough to disconnect the multi-pole connector from the rear. This has a grey lever that has to be unlatched and arced down ward to allow the ‘lever-lock’ removal of the connector. Once this is removed the pod can be slid out of either side of the gap between the steering wheel and instrument cowl.

Mercedes C200 console removed
Make yourself some space and use a soft cloth to put the instrument cluster on.
Carefully release the 2 clips from bottom of the rear of the cluster, pull the cover slightly to just release it from its latches, now do the same with the 3 top clips. The central clip at the top has a warranty label over it that will have to be cut/torn to allow the two halves of the housing to be parted.

Instrument cluster control PCB
Once removed, the back panel can be placed out of the way. Revealed is the main control PCB and orange multi-function ribbon flex connector to the LCD display. This orange flexi-strip is removed from the connector by carefully pushing down the 2 black ears either side, about 1mm, down and away from the connector, this releases an internal clamping mechanism allowing you to withdraw the ribbon flex. Once the flex is released, turn over the instrument pod and remove the instrument chassis from the lens unit.

Remove the LCD flexible connector strip
Grasp each side of the ‘D’ shaped frame that surrounds the display and un-clip it, each side in turn from the front face of the cluster. This will reveal the thin glass LCD display.

Removing the MFD Bezel
Now push up from the bottom edge the LCD glass towards the centre of the dial face, push it just enough to clear the white plastic retaining clips at the bottom, then lever the LCD up and out of the back light holder.

Push back the Motorola LCD unit, then lever up to remove

The orange LED illumination area behind the LCD display
Strip your ‘donor’ instrument cluster and remove your new LCD unit as described above. Fit it to your vehicle’s cluster and rebuild it in the exact same manner as you took it apart (again as outlined above) Refit to the vehicle and test. You should now be able to enjoy a nice bright, high contrast MFD unit !

A nice bright, high contrast MFD display
Just a couple of points to note during this task: Always make sure that the white loom connector to the back of the cluster is as fully home as possible when re-connecting – this plug will often engage half way and give the misleading impression that it is fully inserted and all is OK, the lever even moves down to its locked position! However If it is not fully home the instrument cluster will appear totally ‘dead’ when you turn on the ignition. Dont panic! just correctly insert the plug, latching it fully home and try again. The slight downside is, what will have happened when you turned on the ignition with the cluster disconnected, the SRS system will have flagged a fault on its self test (SRS Indicator fault) and will have raised an SRS fault code. This will have to be reset with a Mercedes OBD scan tool or with the dealer Mercedes Star diagnostic tool. Not the end of the world, but avoided if you make double sure the console plug is correctly inserted before turning on the ignition.
This is a simple, easy fix for a fading MFD and one that can save you a great deal of cash.