
One of the fleet of Sprinters I maintain had developed over time a noticeable rear end wine/noise type vibration that changed note on overrun, there was a high likelihood there was some issue with the differential and further investigation revealed the pinion had worn allowing the nose bearing to push back and forth. This increased end float and subsequent wear in the pinion and crown wheel, had caused the nose bearing to wear all symptoms contributed to the noise experienced. For the record this particular vehicle had covered in the region of 500,000 courier miles!
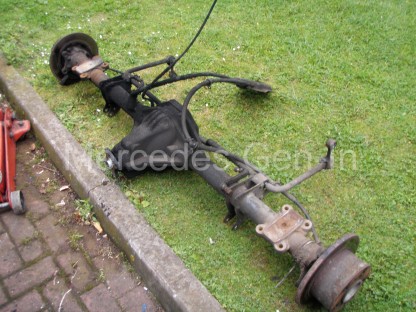
By grasping the input flange any play can be observed, although it is far better to remove the prop shaft itself to determine smaller amounts of wear. Above is a video taken once the diff/axle was fully removed to show the severe situation that had occurred on the van in question.
Replacement of the axle is in itself not a complex task, it is just one that requires careful coordination and a bit of forward thinking due to the size and weight of the component involved. A used replacement was sourced from a Sprinter van breaker and was collected on a pallet. Usually used items are complete with hubs, discs, backplates, sensors and hand brake mechanisms with cables. The sensor cables (Pad wear and ABS/Wheel Speed) are usually cut at the point where the handbrake mechanism is mounted to the underbody so there is often plenty to rejoin to the existing loom. When selecting a used axle look for one that is dry of oil leaks/staining and has the best condition discs and handbrake components as often they will just go straight on without huge work. If you were purchasing a new axle you would have to transfer all your existing parts to the new installation which is quite time consuming.
Once you have obtained a replacement differential it is time to remove the old one! At this point it is worth noting that this type of differential does not have a drain plug, only a level plug. So if you intend to use new hypoid lubricant in your used purchase, now is the time to roll over the diff and empty out the old oil.
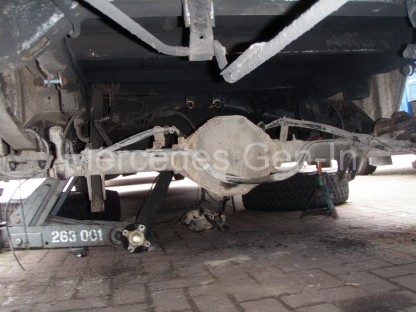
Select a good hard standing for the vehicle and chock the front wheels. Loosen the rear road wheel studs and support the rear of the vehicle on the forward leaf spring mounts with axle stands. Remove the rear road wheels and place them under the sills of each side of the van as a safety precaution, use stout blocks of wood to pack them to a suitable useful height.
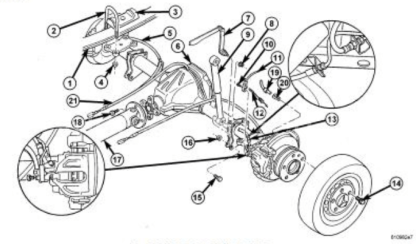
Get underneath and remove the lower shock absorber mounting bolts, the roll bar-to-chassis drop link bolts and the load compensating valve plastic link arm (17mm lock spanner and 16mm socket).
Cut the securing tie wraps from all the differential cabling, then trace and mark which wire goes where (four wires in total, two brake wear sensor wires and two speed sensor wires) It is important to mark the right and left hand cables, especially with regard the ABS wheel speed sensors, as these will need to be remade correctly for things to function as before. Look at the cabling lengths supplied on your replacement axle and determine the best place to cut each wire so you have enough length to work with to re-join the conductors, cut free the cables at your chosen lengths along the vehicle loom and tuck them out of the way.
You may also have to pull free the breather hose from the grommet in the box section next to the hand brake mechanism.
Using a 15mm combination spanner, remove the four differential/prop shaft flange bolts, dropping the prop to the floor out of the way to one side. Normally you would mark the position of the drive flange relative to its mating part but as we are replacing the complete diff for an exchange unit, there is little point.
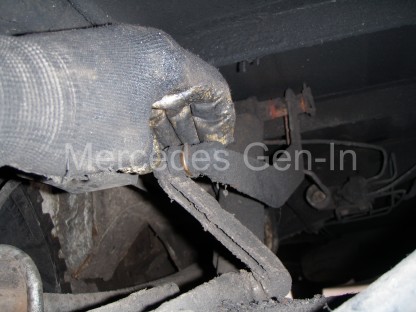
While under the centre of the van, remove the four 13mm bolts that hold the handbrake operating mechanism plate to the van underside, once free, unhook the single long hand brake cable from the actuating lever and place it out of the way. Let the bracket hang to the ground. As the hand brake cables run through a welded spectacle bracket affair on the box section just above the diff it is important to assess how to best /remove or refit the cables through these. There are two options open to you: The first is to remove the cables and thread them through the supporting eyes. (I have always found this difficult, as you have to disconnect the cable inside the drum before you can unhook it from inside the compensator mechanism. While this is entirely possible to do for removal, it could be difficult on the used axle as it is not mounted to a vehicle!) The second method is my preference, though the choice remains yours – using a junior hacksaw cut a slot in each of the upper portions of the bracket, this allows the use of pliers to bend the bracket each side into a ‘C’ shape allowing easy removal of the cables. Once the new cables are in place simply bend back the bracket to its original position. The brackets do not carry any weight and are only provided as cable ‘guides’ – so doing this has little long term effect on the purpose of the guide.
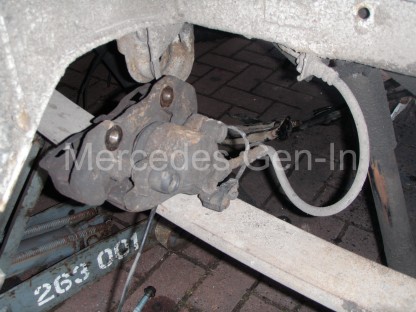
Remove both brake caliper hanger bracket bolts, 2x 18mm and place the complete calipers on the top of the leaf spring towards the front, safely out of the way.
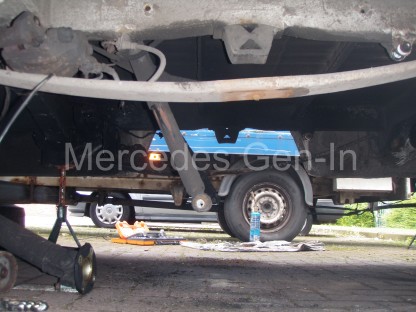
Place a trolley jack under the centre of the diff and just bring it into contact with the casting.
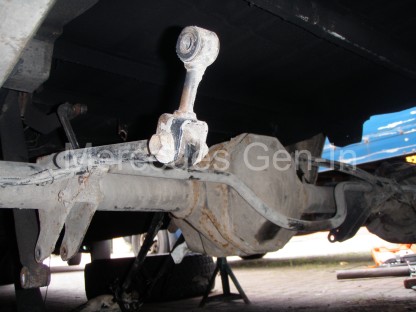
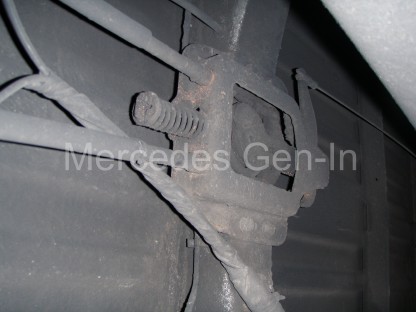
The first real obstacle to encounter will be to remove the two spring U bolts that fix through cast plates on each side of the axle, 2x per side. For this you will need a blow torch to apply some heat and a good penetrating oil. Start by wire brushing the exposed threads and apply direct heat or a good length of time to the fixing nuts. Using a 19mm socket and breaker bar attempt to undo the nuts. If they shear off, do not worry as it is still possible to remove the loop part of the U bolt without the exposed part beneath. It is always a good idea to purchase new U bolts, as it not only makes reassembly easier but also reduces the risk of future failure due to stress or corrosion.

Use penetrant on the holes where the U bolts pass through the cast plate on each side of the differential, maybe a little heat too. Hammer the top of the U bolt downward on its saddle, then upward on the protruding threads beneath. Continue this up and down movement until the bolt eventually releases and raises free of the clamping assembly. Do not heavily /bend over the threaded portion of the bolt during your hammering, as the diameter is a close fit through the hole and it is easy to jam up during its subsequent extraction. Use of a copper hammer is recommended.
If your bolts and lower threaded portion have sheared off then you can apply some upward force by driving a slim chisel into the gap between the cast saddle and the top of the leaf spring as it opens up. Do not use excessive force, just enough to shock the U bolt enough up and down to break the rust that is holding it into the locating holes.
Once both sides are free of the leaf springs, the axle can be dropped slowly on the trolley jack and pulled out from beneath the vehicle. It is a good idea to have a second or third person assist you with this, as it is a very heavy and imbalanced component – two or three people makes life so much easier and safer!
Now the old and new diff/axle are side by side, transfer any parts between the two that is necessary, roll bar etc. If you intend to service the hand brake shoes or at least inspect them on the replacement axle, wait until it is fully mounted and secured back in place as it will be so much easier to work on.
Assembly is also pretty straight forward, trolley the new axle underneath the van and raise it gently, supporting/guiding it at both ends until it aligns with the ‘pips’ that protrude from the base of the leaf springs. You may have to hammer,tap or bar the axle back and forth to get this fully located. Once in position, place the cast saddle bracket and new U bolts in position and tighten each side. You may now remove the supporting jack from the differential and rebuild the remainder of the attached components. Resolder the sensor cables to their correct wire locations previously marked, then use ‘self-amalgamating’ waterproof tape to seal and finish all of your joints before securing them to the hand brake cable runs back to the chassis.
Do not forget to check the level/refill of hypoid gear oil in the diff before driving, this can be done by prying out the rubber bung level plug and filling to the lower segment of the hole. Replace the plug and wipe the area clean.
Job done!