
Electrolux Z4715 – Motor Replacement
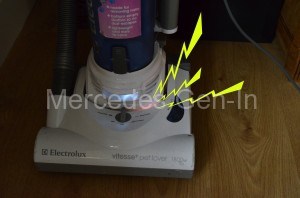
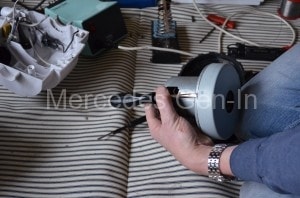
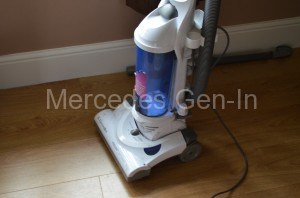
I was about to start a few other automotive jobs when my daughters vacuum cleaner (Electrolux Vitesse+ Pet Lover 1800w – Model Z4715) started sparking and making unusual electrical ‘shorting-out noises’. As you can see from this photo the arcing gave off a light so bright it shone through the plastic casing !
Having quickly switched it off I began the task of taking a look in the hope of fixing it. Obviously it was motor related, so this had to be removed for inspection. These instructions may be of use to anyone taking one of these vacuum cleaners apart with a view to either replacing the motor or fixing it.
Lay the cleaner down and remove the single screw that holds the lower suction pipe holder in place and tilt the pipe out of the way.
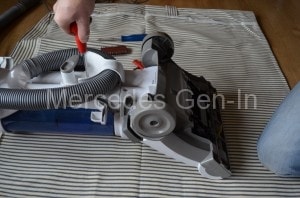
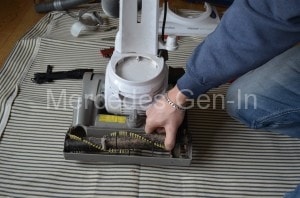
Remove the 4 screws at the rear that hold the main body together. Stand the vac upright, take off the dust collection bin, removing a further 2 screws either side of the carpet brush roller, then remove the belt/brush cover by lifting it at the rear first.
Lift up the brush roller and remove the rubber drive belt from it.
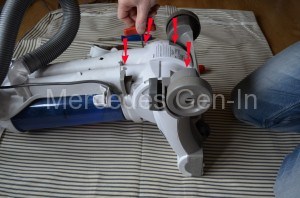
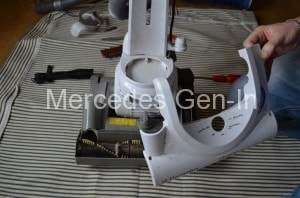
Once the brush roller and belt are removed unscrew the two fixing saddles that hold the main body to the roller housing base and move them to the side to release the upper body. One screw on each saddle either side.

Remove the brush roller housing completley.
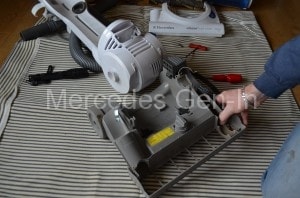
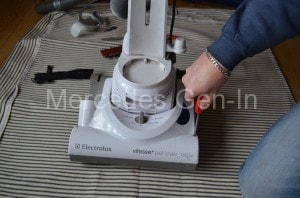
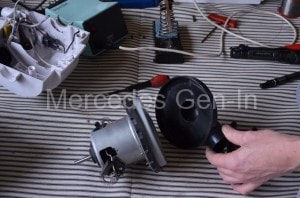
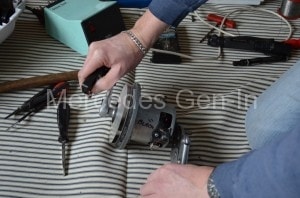
Place the upper vacuum body face down on the work surface and remove the back shell motor cover (screws already removed earlier)
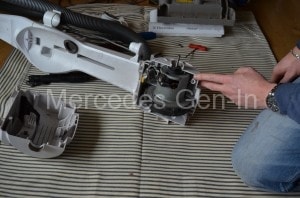
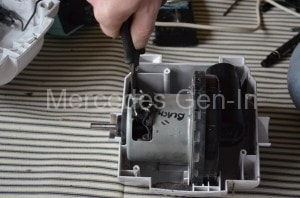
As you can see the motor is now revealed, it is a push-fit unit into the main body and requires no futher screws undone to remove it. Lift up the motor slightly to gain access the the wiring connections that next have to be removed.
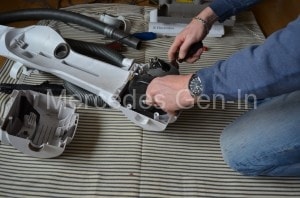
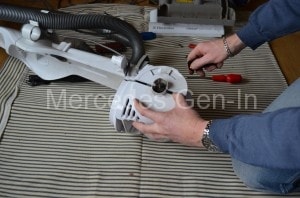
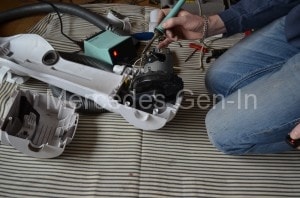
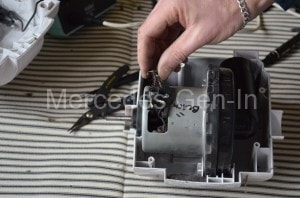
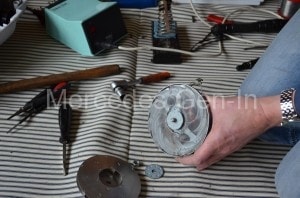
The motor and suction fan assembly is one combined unit, attached only by 4 electrical connecting wires to the brush gear. There is one grey and one black supply wire, it is worth marking on the motor body with a felt pen the locations, its best to also identify which of the of the 2 white sleeved supression capacitor wires share the brush connection and clearly mark them to aid reassembly. You will now need to ‘fire-up’ the soldering iron as the connection wires are soldered to tabs on the motor. Use the solding iron to remove them and then once disconnected, withdraw the complete motor from the main vacuum cleaner body.
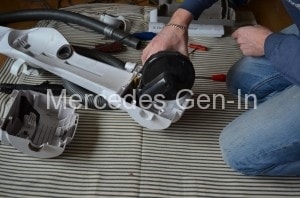
At this point it is best to mark the position of the fan housing with felt pen, with regard to the the outlet pipe position and the steel motor body so it can be repositoned correctly on reassembly. Pull off the black plastic fan housing and large rubber seating ring from the end of the impeller assembly, also remove the smaller circular rubber bushing at the back of the motor shaft.
The motor is now in its bare state and can simply be replaced with a new unit at this point. Electrolux Part Number – 4071409488 The integrated motor/fan assembly is available as a spare part for direct replacement on-line at a reasonable cost here or available through local domestic appliance spare parts outlets. Fitting the new motor is very straight forward indeed if you take care to mark the wiring and physical position of the motor prior to removal. Rebuilding the rest of the vacuum cleaner is also quite simple and a direct reversal of the above procedure.
I was told by my local Electrolux dealer that the brushes were not available for this Electrolux model of vacuum cleaner and that the motor assembly ‘complete’ was listed only in the current spare parts catalogue. For those of you with a little more interest or ability, the motor can be broken down and serviced/cleaned should you wish to venture further (Although Electrolux state this is not a maintainable sealed part and must be replaced as a complete assembly. I would only recommend fitting a new motor ‘complete’ and the following is only noted for general interest and information should you be a curious DIY’er wishing to delve further !
Dissasembly of The Motor / Fan of the Electrolux Z4715 Upright Vacuum Cleaner.
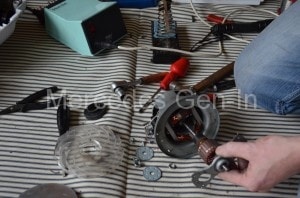
Once removed from the main vac body the motor can be checked for any roughness in the shaft bearings as you rotate it (some noise is permissable), if there is a lot of rumbling noise or worse a high degree of end-float/play in the shaft, these bearings will be toward the end of their life and in need of replacement. If the bearings exhibit this wear, it would be normally prudent to abandon further motor investigation / repair and obtain a complete new motor fan unit from Electrolux. If the bearings check out OK the brushes can be removed for inspection, this is done by taking a pair of long nose pliers and twisting straight the two small steel tabs on each brush holder cap to allow the ‘sprung cap’ to be removed upward and outwards – withdrawing the brush and pressure spring out from the brush holder and away from the motor commutator. This can be done on both brush assemblies. If the brushes are worn I suspect that replacements can be obtained if you are able to match them to power tool spares even though unavaialble from Electrolux. You can see that the carbon brushes copper braid is soldered to the connection tab and this would need to be unsoldered in each case if you were to replace the brushes. Make sure the brushes are free to move easily in and out of the brush holder and that they do not snag or catch, any roughness of the slide can be cleaned with a small needle file to aid easy movement.

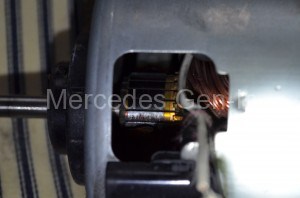
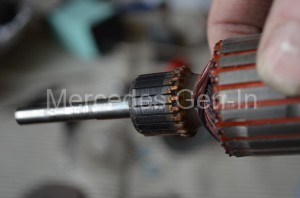
This carbon brush, although still looking quite long – is worn significantly in length and will need replacement as the brush pressure from the spring becomes reduced and the resultant weak contact pressure of the brush to commutator will causing fierce arcing. If you able to find new/replacement brushes the commutator on the rotating shaft will need attention before refitting your replacements. As you can see here below the commutator is burned and needs a little cleaning up.
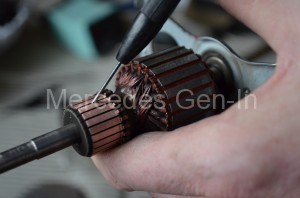
Dismantling the motor assembly further is straight forward. First remove the steel circular cover from the fan unit, do this by taking a broad tipped screwdriver and tapping it round its perimeter with a mallet or small hammer used in the position indicated in the photograph. Its only a push fit and with care will come away easily.
Once the cowling is removed the impeller is removed by gripping the motor shaft at the opposite end with mole grips or in a vice and undoing the securing nut. (Take care not to cause damage to the gripped shaft) Note that the securing nut is anticlockwise thread and opposite to the normal convention of untightening! Once removed the impeller can be removed by lifting off the shaft. It is sandwiched between two steel support clamp washers either side and also a small shaft spacer to hold it way from the motor face. Take note of the positions of the washers and spacer to aid re-assembly.
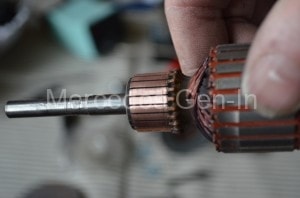
Once removed the impeller will reveal a clear plastic ‘air-guide’ for motor cooling, this is removed by removing 2 small cross head screws to reveal a steel cross-plate support that holds the nose bearing of the motor shaft. If you have not already, remove the brushes as they will be damaged if still in contact with the commutator as it is withdrawn. Remove a further 4 screws (2 each side) that hold the support plate and try and it pull it away out of the motor windings. If it proves stubborn, strike the unthreaded end of the shaft with a mallet, it should now be able to be removed and inspected. Here is close-up of the motor commutator showing burn and pitting caused by the arcing of the weak contact pressured brushes.

Clean the commutator with 320 or finer wet and dry – emery cloth. It should clean up well with a little work and look like the photograph below. Gently clean out the slots between the commutator segments with a fine screwdriver, and then give it a final ‘once -round’ with the abraisive paper to flatten any burrs before refitting.
Rebuild the motor and fan unit as an exact reversal of the above and refit it to the vacuum cleaner. Fully rebuild the cleaner, plug-in and test ! Either have a celebration drink or put the money towards a new replacement motor fan unit – if you dont fancy that, dig much deeper in your pockets for a brand new vacuum cleaner ! 🙂
Nice job you did there. Have same problem, looks like £20 for new motor or probably a replacement vacuum. This electrolux was always noisy and generates far to much heat. Cheers
Hi Paul,
I think its the case these days to cram the most powerful motor into the smallest spaces and cooling suffers. That Electrolux vac has always been noisy, just like a Dyson. We passed that one on and bought a Miele – which although very heavy is a high quality super quiet machine that just does what it says on the tin – very well!.