If you own a commercial or working vehicle, from time to time you will without doubt attract the odd knock or bump along the way that adds character to your van. Not everyone wants to pay premium bodyshop prices to rectify these scars and in many instances its just a matter of keeping the van respectable and not looking like an old hack.
For this reason I have added this post, hopefully to give you some confidence to carry out your own simple bodywork repairs, especially if it is something you have never tackled before. Before we begin I will point out that any DIY repair will often fall short of professional refinishing to that showroom standard, but if you are looking to tidy up a few knocks and bangs to a reasonable ‘working vehicle’ standard then read on…
Any length of time you invest in putting right bodywork wrongs, is directly proportional to the quality of the end result. It is worth remembering that a ‘quick-job’ will more than likely look like one, so be prepared to spend some time to do things properly and get the best results you can.
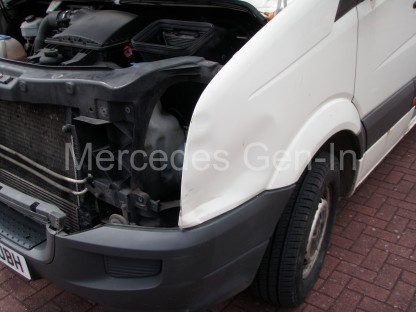
One of my clients drivers made a clumsy turn-round manoeuvre in one of the LWB Crafter CR35’s and being one of the tidiest and latest vehicles on the fleet it seemed a shame to leave it in a state of disrepair. The price of a good white painted second hand wing was in the order of £250 and a 100 mile round trip to collect – not what he was looking to pay. Any professional body repair work would mean time off the road for the vehicle and currently this would not be possible, so I offered to to rectify the damage over the weekend.
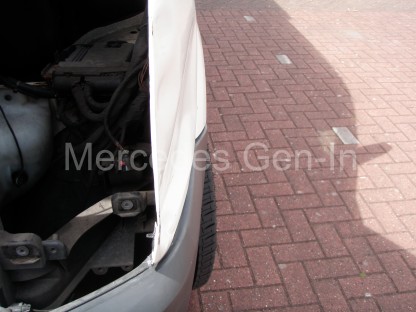
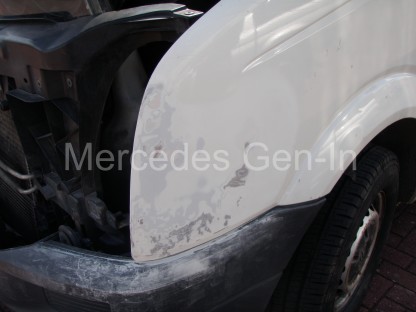
Here you can see a photo of the initial damage, fortunately the lamp assembly was not in any way broken so the repair was confined to the wing panel itself.
Half the battle of any body repair is having some kit to help you, this will not cost you the earth and it will always be on hand for any future jobs that you may wish to take on. The remaining half of the battle is having the ‘balls’ to take on the job of physically hitting out the dent – especially if its something new to you. What you have to remember before you start is – you can’t make it any worse really can you!
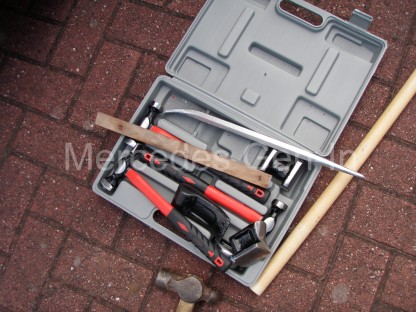
I use a cheap and cheerful Panel beating set from Machine Mart, costing around £35 for a comprehensive set of hammers and steel dollies. As I am no panel beating or bodywork expert, this is about the maximum I am prepared to invest to get the job done.
First I removed the grille, headlamp assembly trim panel and lamp unit. This revealed good access to the back of pretty much all the area of damage. This is ideal. If the dent you wish to get at is further back, then you would probably have to strip out the plastic wheel liner and remove the road wheel to gain suitable access.
Holding a steel dolly on the outside of the wing, strike the inside of the wing/dent to start to bring it outward. Don’t worry about over-bending it slightly at this point as you can aways dress it back. Moving the dolly about to absorb the hammer shocks, try and model the wing to its original contours and shape. Once the outline shape starts to recover, reduce the force of your hammering and begin to strike the point where the dolly touches the point on the surface of the outer wing.
Your hammering sound will change when you start to hit the correct point, it will begin to ‘ping’. This means you are striking the metal perfectly, sandwiched between hammer and dolly, flattening the rippled and dented steel as you proceed. If your dent is horizontal, work vertically in lines, up and down over it to work out the kink in the metal sheet, if your dent is vertical, do the inverse.
You will soon get the hang of tapping with the flat faced hammer and deforming the metal, flattening it onto the dollies.
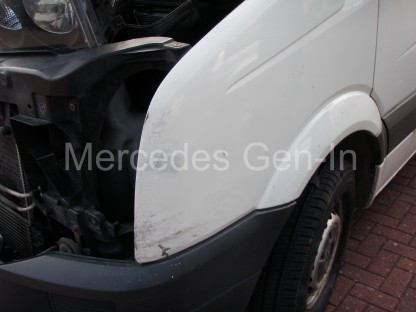
Take your time, use the range of dollies in the kit to access all the areas needed, use the wedge dolly on the panel lips and edges and the flatter anvil types on the more linear surfaces. The original shape will begin to emerge. Any high spots on the outside, reverse the hammer and dolly to knock the panel in onto the anvil, working from both sides of the steel where necessary. There is a great little web article on Panel Beating for Beginners here should you wish to read up a little more before you attempt your repair.
It should be possible with careful work, to get the shape of the original wing back without the need to use large amounts of filler or bonder. To be truthful, only a light skim of filler to flatten any imperfections should be what you are looking to achieve in your panel beating.
Test the fit of any components that may have a closing or butting edge to your work, be sure that everything aligns as it should.
Now rough-up and sand the repair surface with abrasive paper and a block, you will begin to see any high/low spots, re hammer if needed. Apply a thin coating of filler where needed and sand flat when hardened, any imperfections address with more filler and sanding. Work your way down in abrasive paper coarseness to obtain a smooth paint ready surface.
Suitably mask off any area that is likely to be subject to overspray. Be sure to use a primer of similar colour base to the top coat e.g white primer for white, grey for blacks and blues, red for red and so on. It makes a difference to coverage and the final shade of top coat, so choose with some care. Be sure to sand down each coat of primer to a smooth finish. The primer itself will begin to fill small imperfections in readiness for the top coat, each coat of primer improving the chances of success with the top coat factory colour.
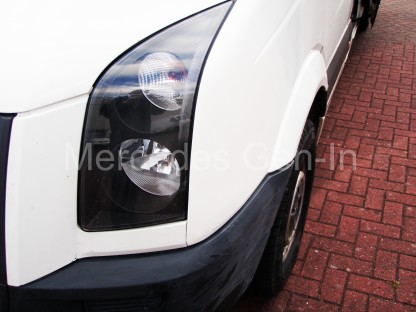
Wipe down the area and try to make it as dust free as possible before spraying with the factory colour. Only apply light coats and let it dry between sprays, building a good thickness of paint is important that can eventually be cut back and polished. Use a good coating of paint, I used almost a full can of top coat on this small area, this allows for any flatting or buffing without wearing down to the primer coat.
After leaving to dry for a good couple of hours you may begin to carefully build up the rest of the van, grille, headlamp and so on. Do not attempt to work on the paint for a least a day has passed, as it remains soft, even if dry to the touch, for several days before it is fully hard.
I think you will agree that the repair was a success and in actual cash value (not counting any time) it cost £60 to complete, this includes the tool set and materials.
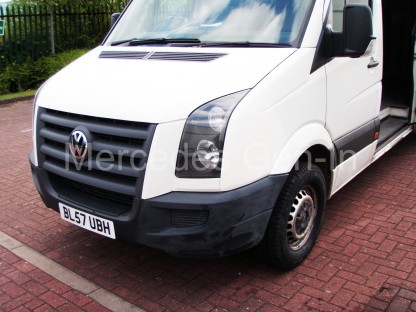


Very tidy job there Steve, well done.
Thanks for the praise StM. I was very pleased with how much of the dent I actually recovered without the use of any great amount of filler.
All the best
Steve