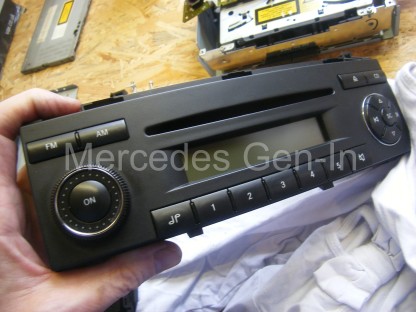
The Mercedes Sound 5 fitted to Vito and Sprinter vans is a generally reliable unit that performs adequatley for the most part within the environment of a commercial vehicle. There has been two manufacturers that have produced the radio, Hyundai and Becker. Although the units are similar in function there are some physical differences to the layout and choice of internal components. Both offer similar audio features and identical connections, designed and produced in alternate factories.
There are few reported problems with either model of the Sound 5 unit, but there are a couple of common issues that crop up from time to time.
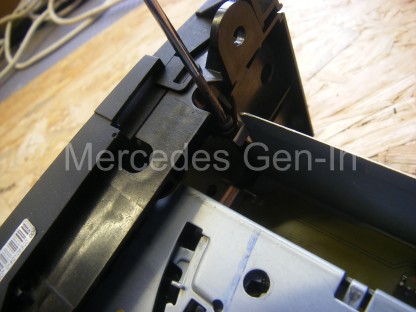
The faults: The occasional loss of display and button functionality is the most seen fault and in most cases can be easily rectified by following the procedure outline in this post. The chassis of the Becker radio is shown in the photographs below and it comes apart in a very simple way. First lift up and remove the upper steel cover lid by levering at the back. Identify and remove the two torx head screws either side of the front upper chassis just behind the front panel. Pull either side of the chassis sides outward to disconnect the latches either side of the front panel. Lever the front down and off the chassis.
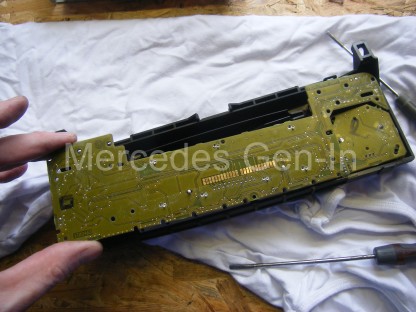
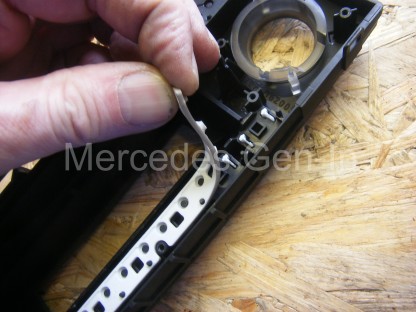
What this now reveals is the common cause of the above problems, poor connection between the chassis electronics and the front panel. There is a row of gold contacts on the Becker made radio that mates with a sprung leaf type chassis connector strip. This connector carries all the communications from the front panel to the micro controller mounted on the chassis PCB. There is a multiplexed communications bus that sends and receives commands to and from the front panel, causing buttons to have actions and the display to illuminate whatever the CPU tells it.

Corrosion due to the damp (condensation) environment in which the radio lives, begins to tarnish the connections between the chassis and front panel. The panel PCB’s plated pads take on board some discolouration / oxidisation, as do the mating tips of the sprung leaf contacts. To maintain a good connection between the two assemblies is important, as the communication and functionality of the radio depend on it. When these contacts become less reliable a catalogue of faults can start to appear. These faults are usually – Buttons do not function as they should, it becomes impossible to turn off the radio, the display inverts or displays nothing, except the amber back light. Even sometimes resetting with the ignition does not always bring back the radio to a working condition.
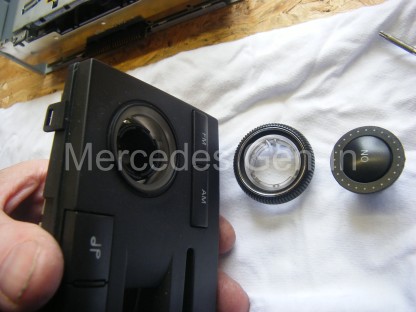
With the front panel face down on a soft cloth, remove all the self tapping torx screws on the rear, carefully unclip the four plastic tabs, one on each corner of the lower and upper edges. Once the plastic back panel has been lifted off, turn over to the front and grasp the volume ring by its edges, giving it a straight pull. The volume ring and ‘on’ button will unlatch, keep them safe. It is now possible to remove the PCB from the button matrix mounted in the front part of the housing.
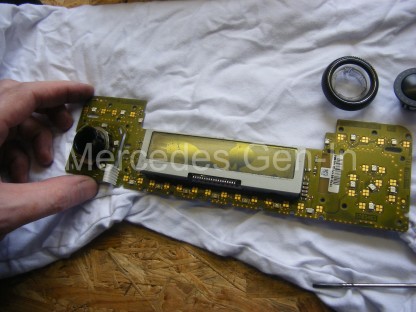
I had a damaged LCD display in the radio I was repairing, no doubt caused by someone pressing or banging the radio front to get it to display correctly. I have tried to source spare parts from Becker and Hyundai for both models of radio and as yet have had no success getting individual LCD display parts. What I had managed to do, was source another radio with a faulty chassis quite cheaply. I was going to exchange the front panel PCB between the two units, as the good LCD display was housed in a case that was more worn and grubby than my own. By changing over just the display unit in the front panel I was preserving the chassis security coding that is mated to the ECU in the vehicle. If I had just fitted another radio, I would have had the ‘PROD’ error as described here in this post, and the radio would not have functioned.
If there had been liquid (soft drinks especially) spilled on the preset buttons at some time and they have become ‘sticky’ and do not return to their normal position – while the front panel is in pieces, it is a simple task to clean this off and have the radio working as good as new. Once the PCB section is taken out of the front panel it can be seen that the faceplate houses some ‘rubber membrane’ push button pads. These contact with conductive areas on the front side of the PCB allowing a button press to transmit a function to the processor. The plastic buttons just provide a means of pushing the conductive rubber membrane against a circuit board ‘pad’. Once the membrane is removed the buttons can also be unlatched if required and washed in mild detergent.
Simply peel back the rubber membrane in one of the three obvious active sections and push the protruding button stems back through to the front of the panel with a thumbnail, thus removing them for cleaning. If you were to photograph the front panel before disassembly you could remove all the buttons from the facia frame and wash them all in soapy water, leaving them in a warm place to completely dry before building it back up as per your image. If the rubber membranes are contaminated, wash these very gently, taking care not to use any solvent or abrade the conductive tip areas on the rubber pads. Similarly, allow these to dry thoroughly before refitting and building up the front panel.
The main contact pads areas on the rear of the front PCB were cleaned using a fine cleaning rubber block (you can use a pencil eraser) until bright and shiny, the same was done to the sprung contact leaves on the main chassis, and the front panel rebuilt then fitted back to the chassis. Be sure to latch the lower edge of the front panel under the chassis lip before folding back the front panel to its fitted, engaged position.
Fitting the two side retaining screws completes the front panel mounting.
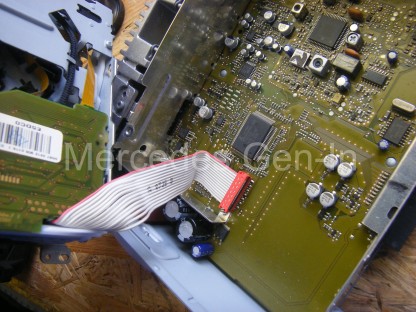
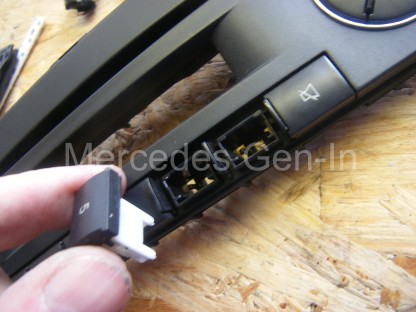
If you wished to swap-out the CD deck, it is very easy to accomplish before refitting the front panel. Simply undo the four screws at each corner of the deck and lift it upward. This reveals a single ribbon cable with red connector to the main PCB. Pull upward the connector and release the CD deck from the chassis. A new or replacement assembly can be fitted quickly in the reverse order.
Hyundai HA1111 Sound 5 – Top Becker Sound 5 – Bottom.
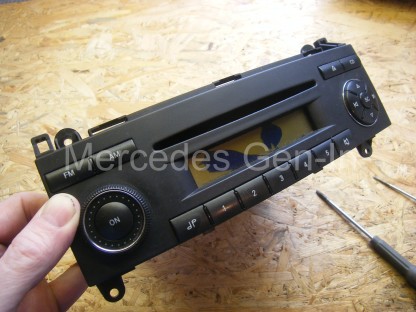
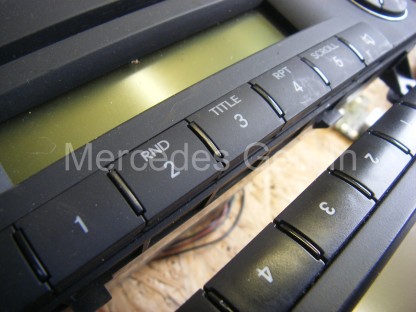
The Hyundai made radio chassis has some differences from the Becker model, namely the front panel has extra function legends visible above the preset numbers and also the rear panel alloy casting is slightly different. The photograph below shows the Hyundai HA1111 radio, with its ISO plug connected for identification. Although the CD deck can be swapped between models, with the exception of maybe the volume control knob and a few plastic bits, that is as far as it goes with regard common parts. The Hyundai front panel PCB contacts the chassis using pointed pins set in an offset pattern, and as such the two facias are not interchangeable. It worth noting however that the Hyundai player suffers the same contact oxidisation issues as the Becker model and it can be cleaned and serviced in the very same way.
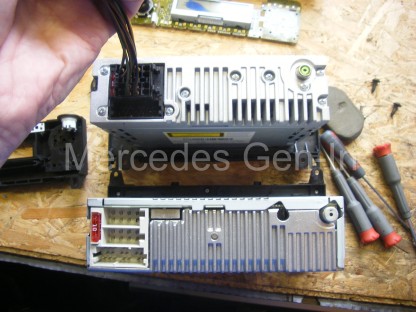
Becker Sound 5 – bottom radio, Hyundai Sound 5 – top radio
Quite often this simple procedure is all that is needed to recover your radio to working condition and it is well worth the simple work involved.
You can of course get to check out and test all the pixels and test the contrast of the LCD display by entering the ‘test’ mode, where you will be able to make other key adjustments and changes, for example: activating the AUX feature if required, to utilise the radios auxiliary audio input capabilities with an external MP3 player etc. See this post here.